Flow Editor
The
page is the starting point for creating and modifying flows.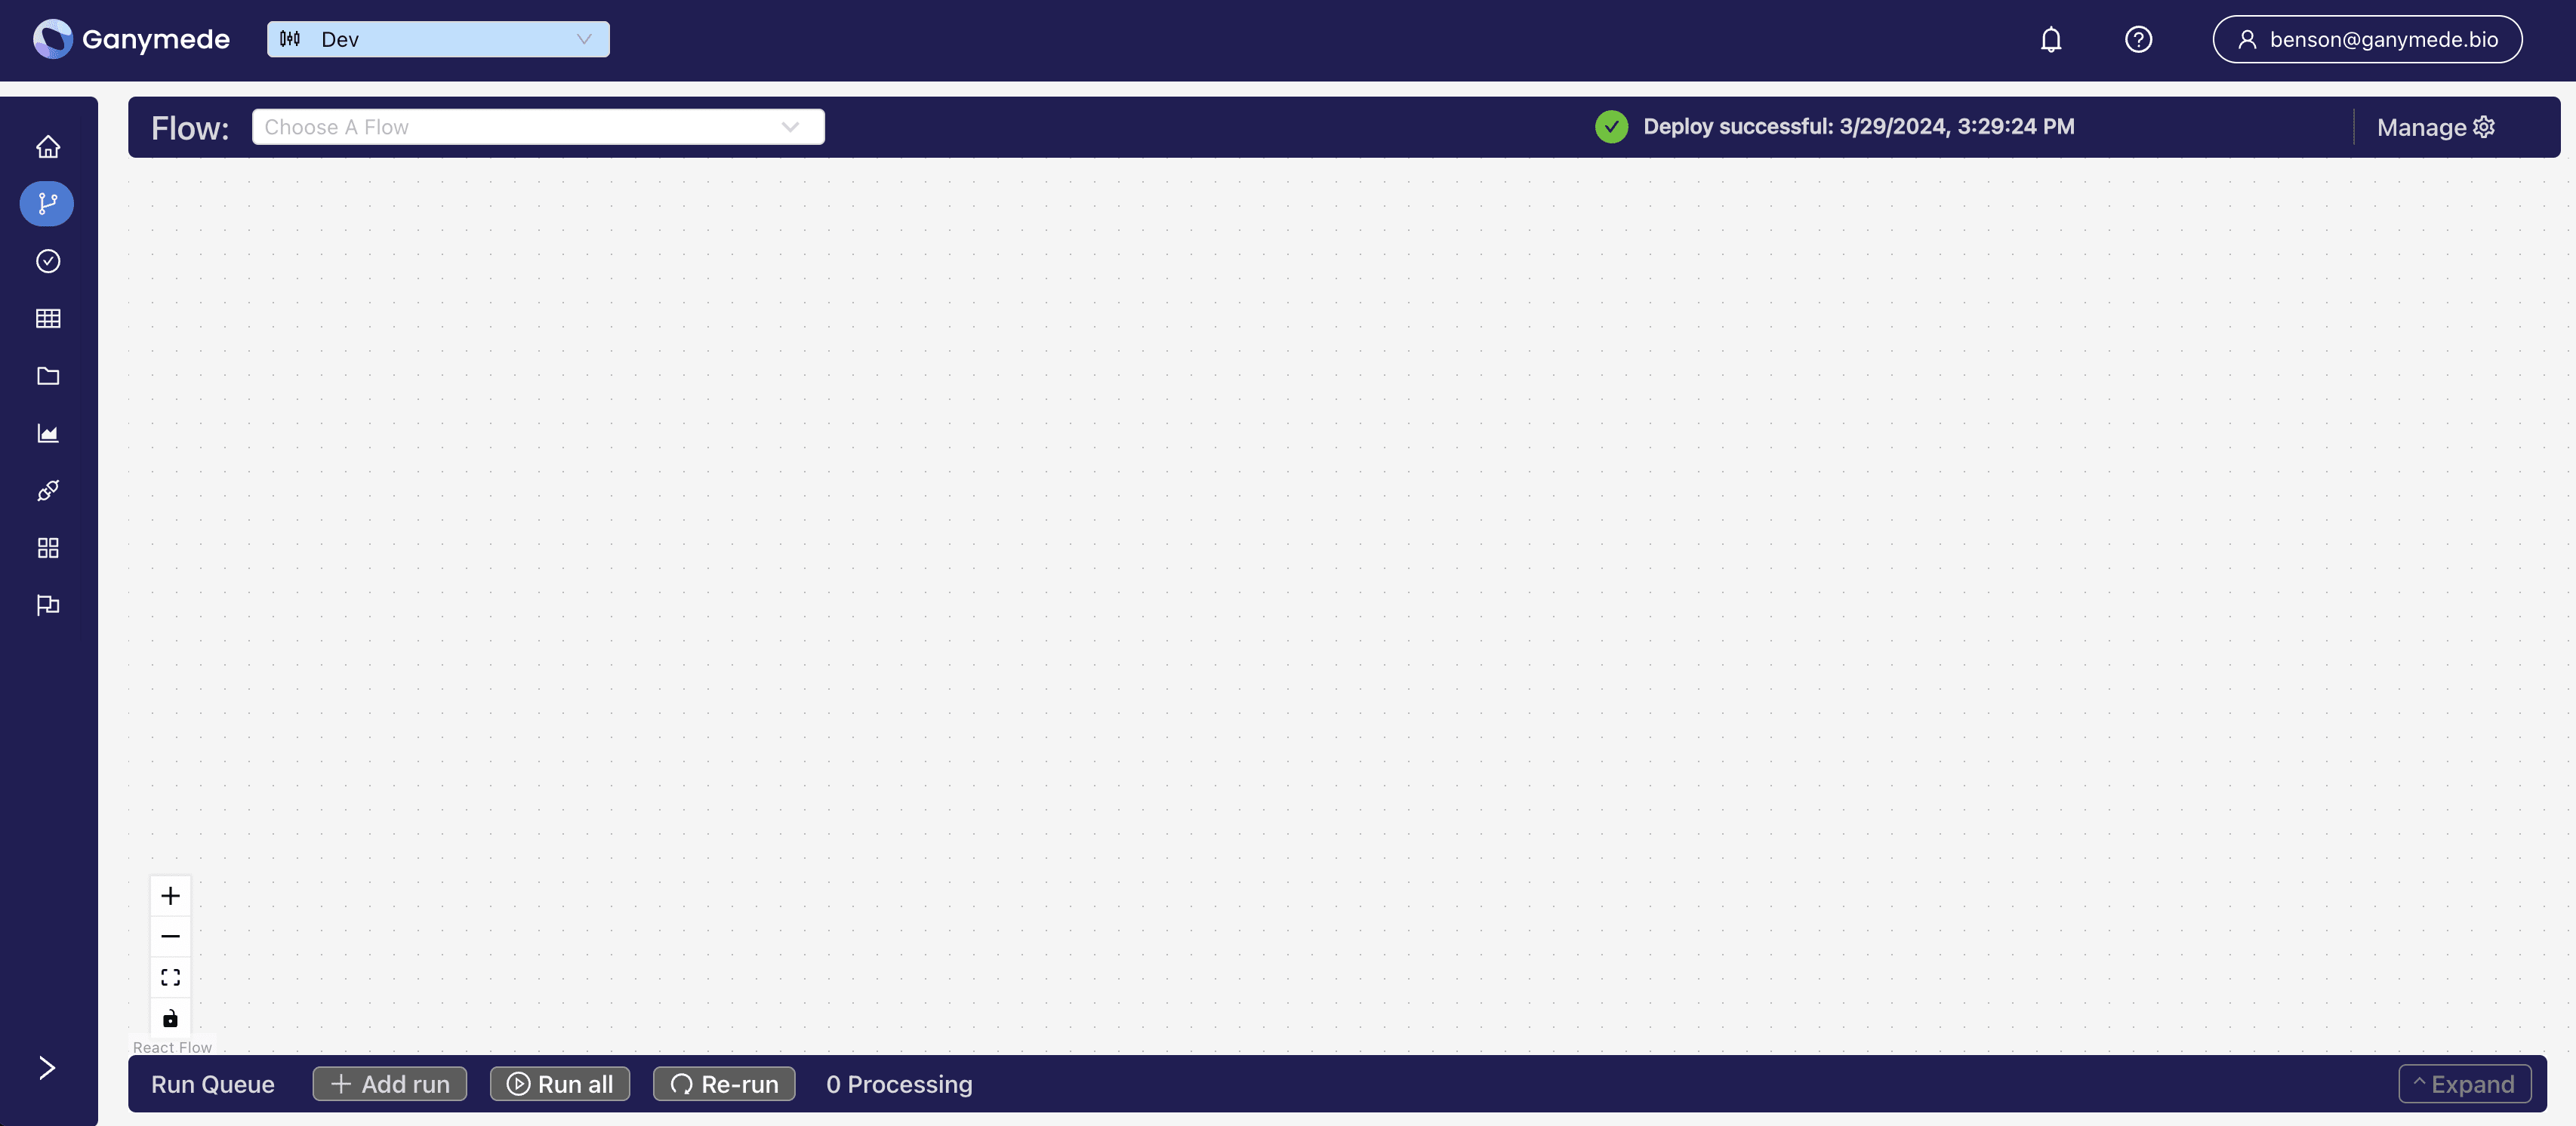
Header Bar
The header bar contains buttons for creating flows and monitoring flow runs.

-
Choose a Flow: Selection box for specifying the flow to load.
-
Node: Opens right sidebar for selecting new node to add.
-
View: Opens right sidebar for specifying whether flow should be laid out horizontally or vertically
-
Analysis: Enables access to Jupyter notebooks which can be used for ad-hoc observation and data analysis. These notebooks are hosted on a virtual machine (VM) separate from the workflow management software running the flow.
-
Save: Button to save flow layout to git repo and deploy code to workflow management system.
-
Manage: Opens right sidebar to create new flows or delete existing ones. When a flow is selected, we can apply new configurations to the flow.
- Owner - Owner of the flow. The flow will appear on the home page for the owner of a flow.
- Retries - How many times the flow would retry to execute a node, in case of an error or a timeout.
- Emails - Emails to notify in case of a failure.
- Auto run trigger - Times to run the flow automatically if selected.
- Assign Flow to - Users assigned a flow will have the flow appear on their home page.
Run Queue Bar
The Run Queue Bar located at the bottom of the screen contains buttons for executing flow runs. The full menu can be accessed by clicking on the
icon in the bottom right corner of the bar.
- Add run: Adds a row to the run queue.
- Run all: Runs all jobs loaded into the run queue.
- Re-run: This requeues the last row that was ran for this specific flow. The button is greyed out if the current session had no prior runs, or if the page has been refreshed. If inputs have changed, this button will fill out all parameters that exist using the existing run.
- Processing: Shows the number of files in the queue for your next run. Clicking this button brings up the page.
Flows
To create a new flow, click the
button in the upper right hand corner of the screen. Then click the button on the sidebar. This action exposes a modal for naming and describing the flow.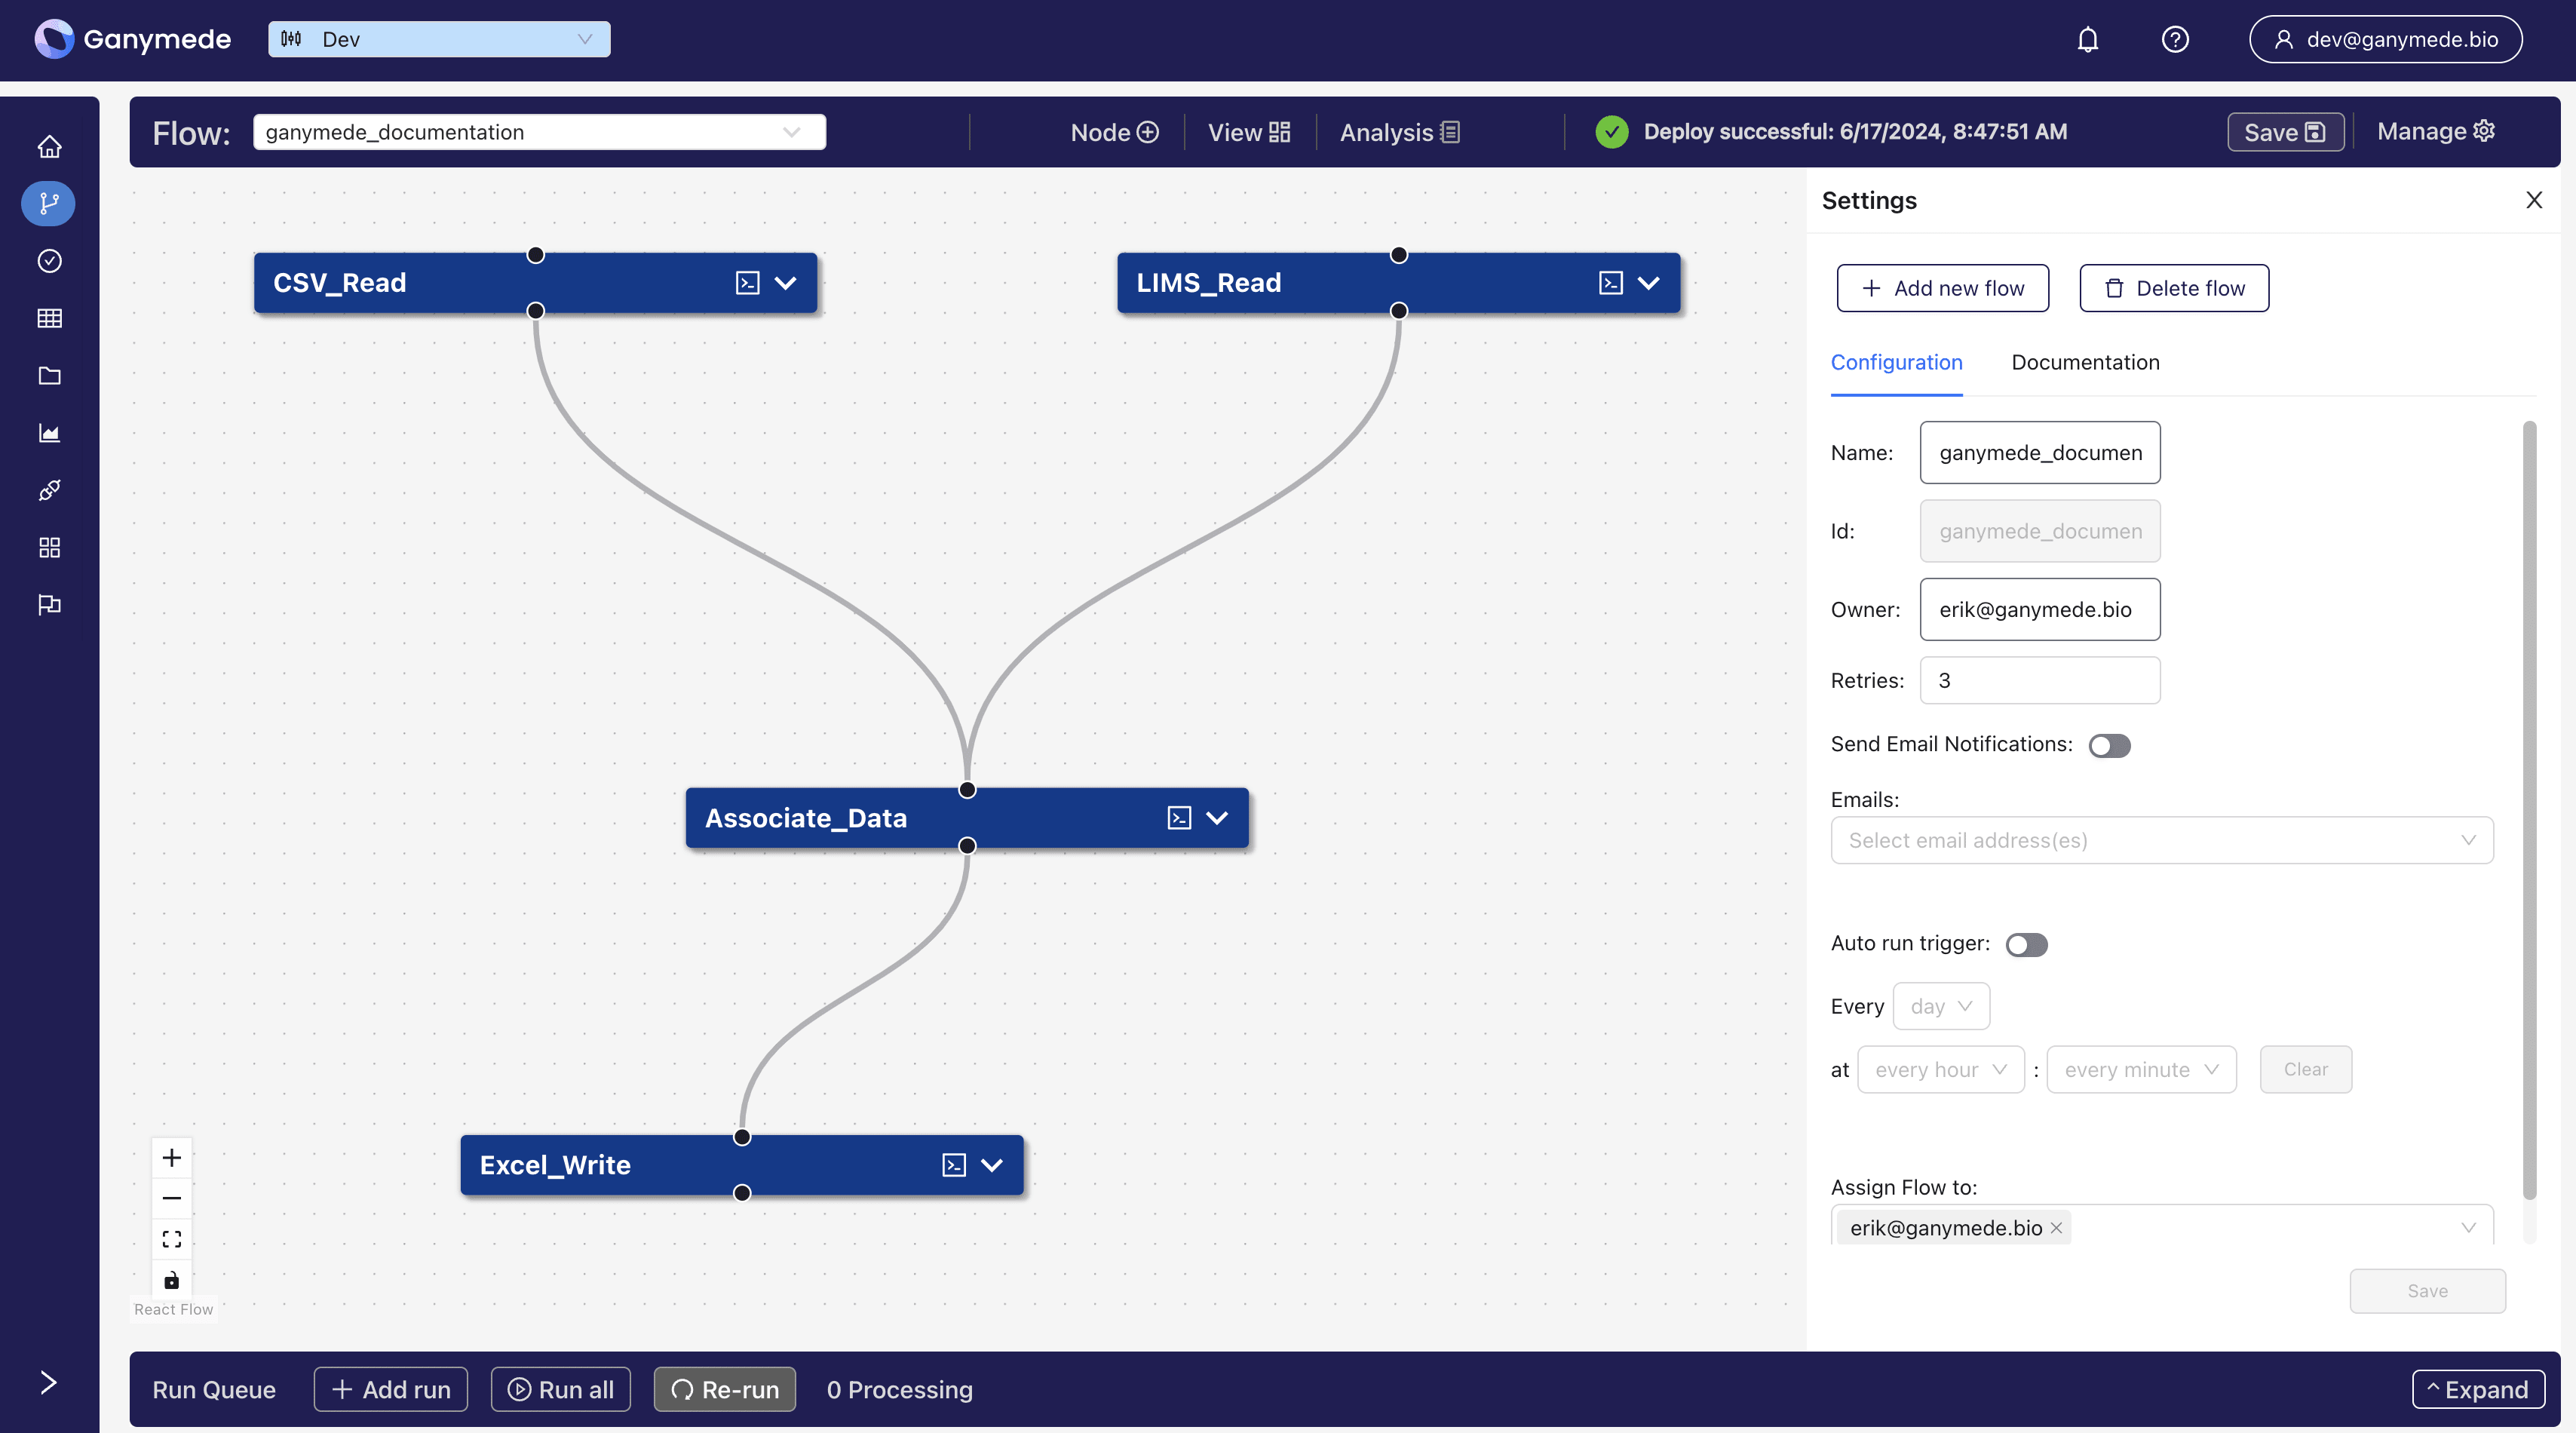
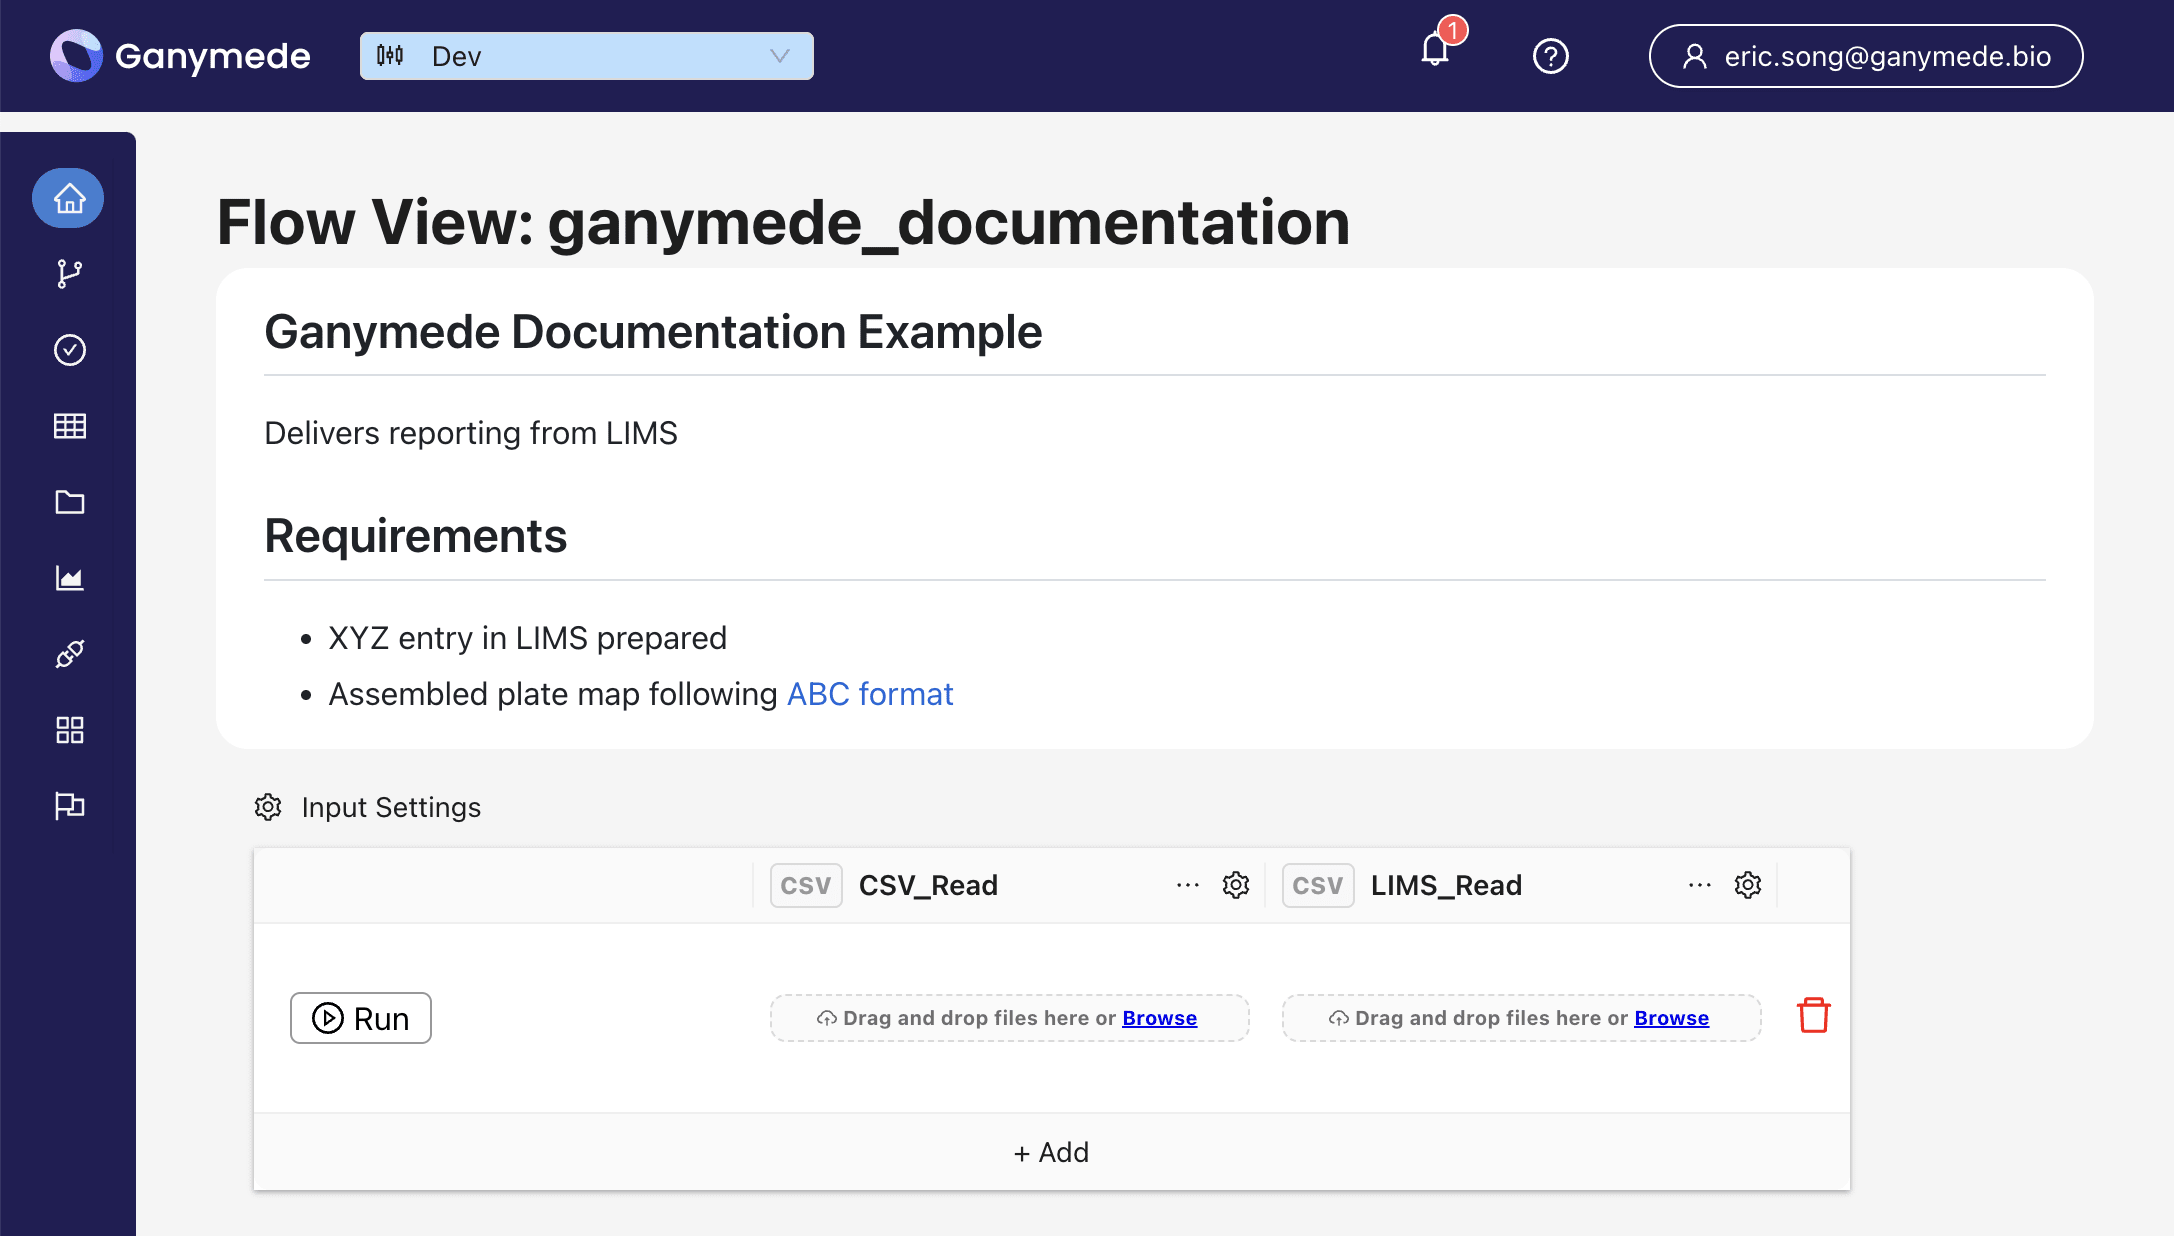
Documenting Flows
The documentation allows developers to specify instructions for flow execution; for example, developers could specify the purpose of the flow and the expected inputs and outputs.
Initially, the documentation is set to the Flow description given when creating a new Flow.
Flow Documentation can be edited through the "Documentation" tab in the
sidebar in the Flow Editor.The documentation box accepts Markdown.
Writing the following markdown:
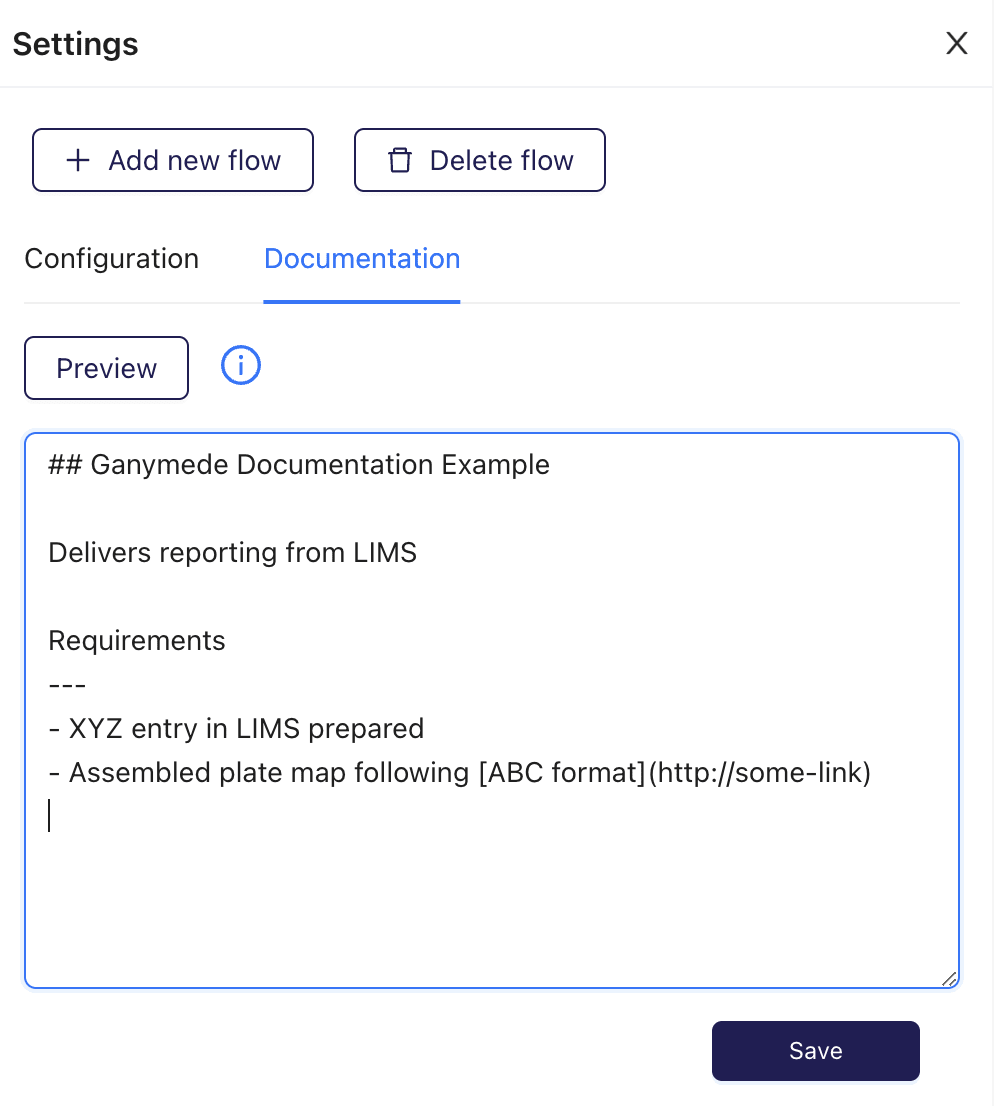
Generates this rendered documentation:

The Flow Documentation will also be shown in the Flow View page
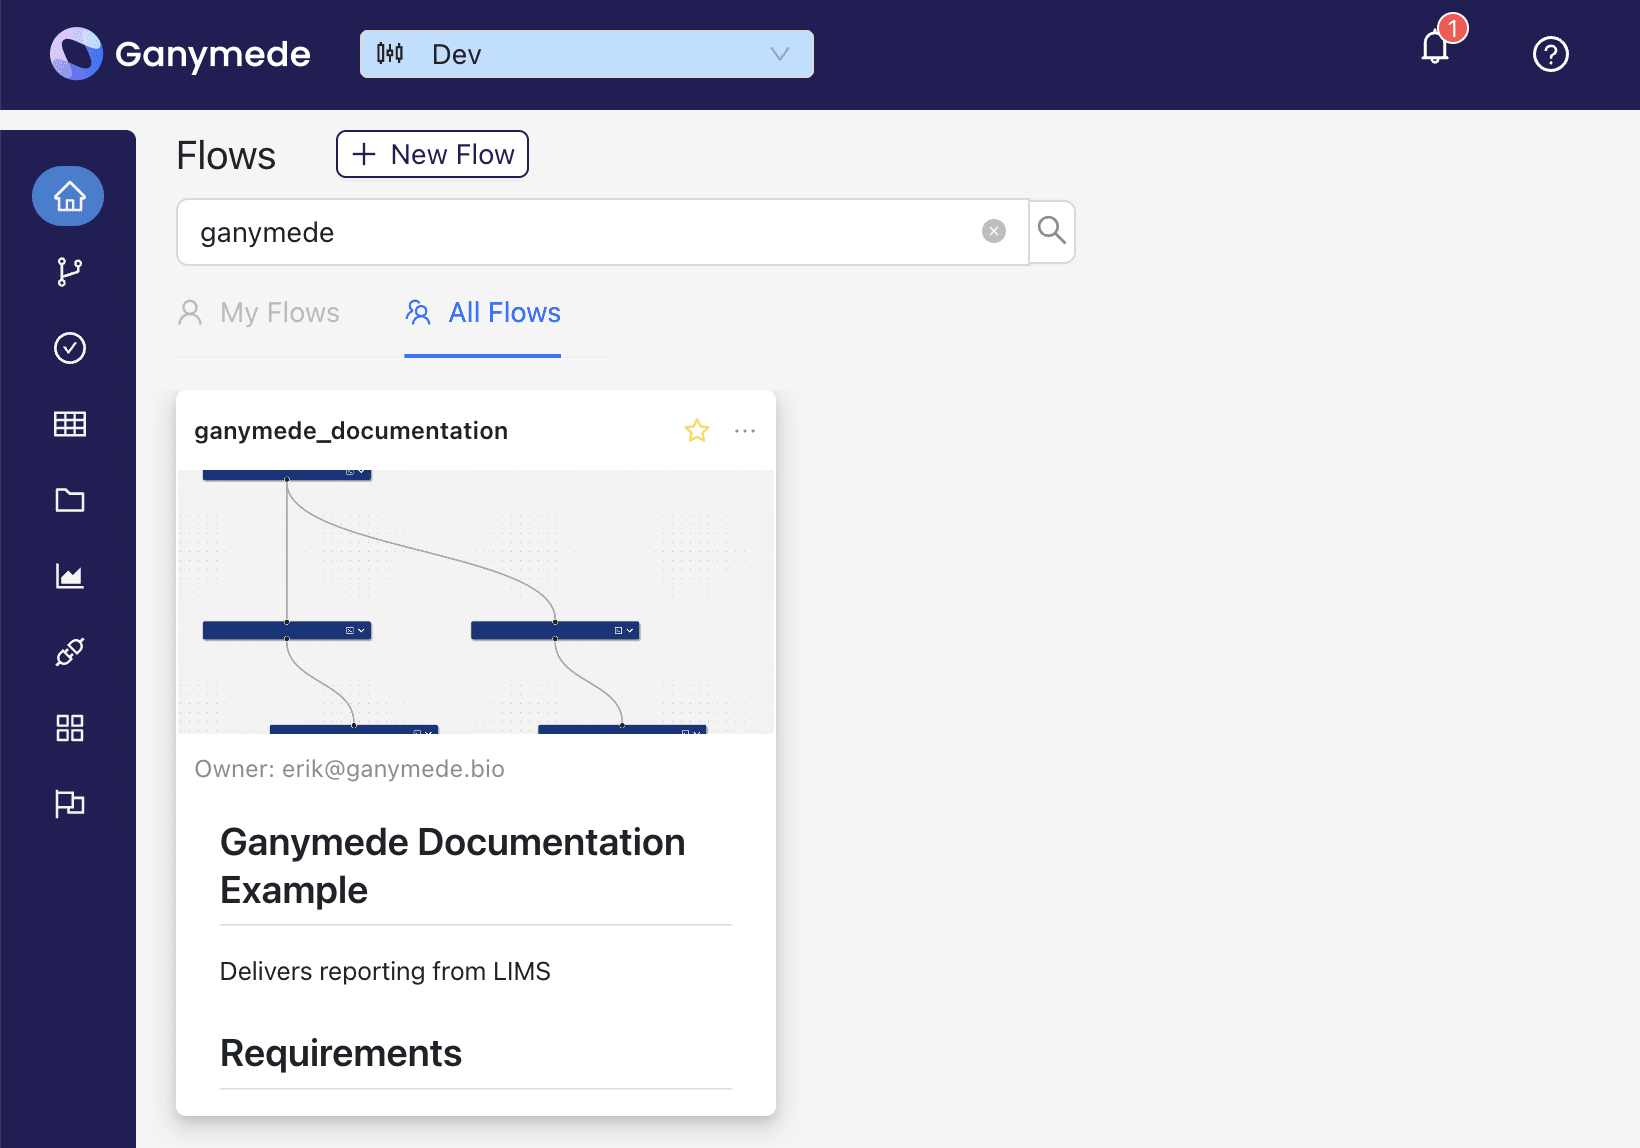
A smaller preview of the Flow Documentation will also be shown in the Flow Cards of the Home page.
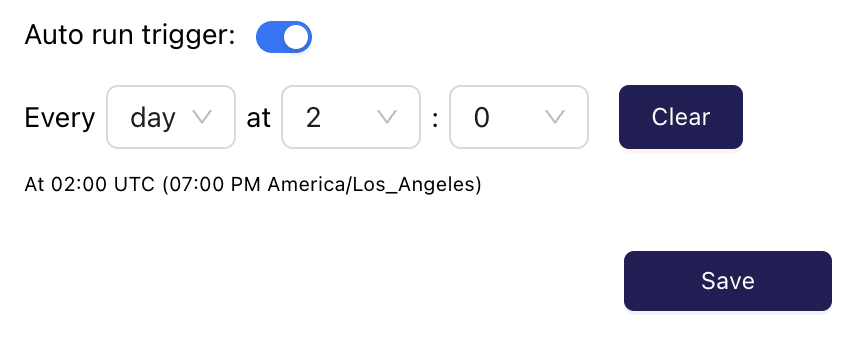
Scheduling Flow Execution
Flows can be configured to automatically run on a schedule. The schedule is set by selecting from the dropdowns shown below and can be configured in intervals of months, weeks, days, hours, and minutes.
Configuring Email Notifications
Email notifications are sent to specified users upon flow failure; an example email for this is shown below.

Configuring Retries
Retries and email notifications associated with the flow can be specified in this modal. Retries is the number of times that a node run within the flow is retried before processing is considered to have failed.
Loading and Saving Flows
To load a flow, specify the flow to load in the
selection box. Upon doing so, the primary pane displays the graphical structure of the flow.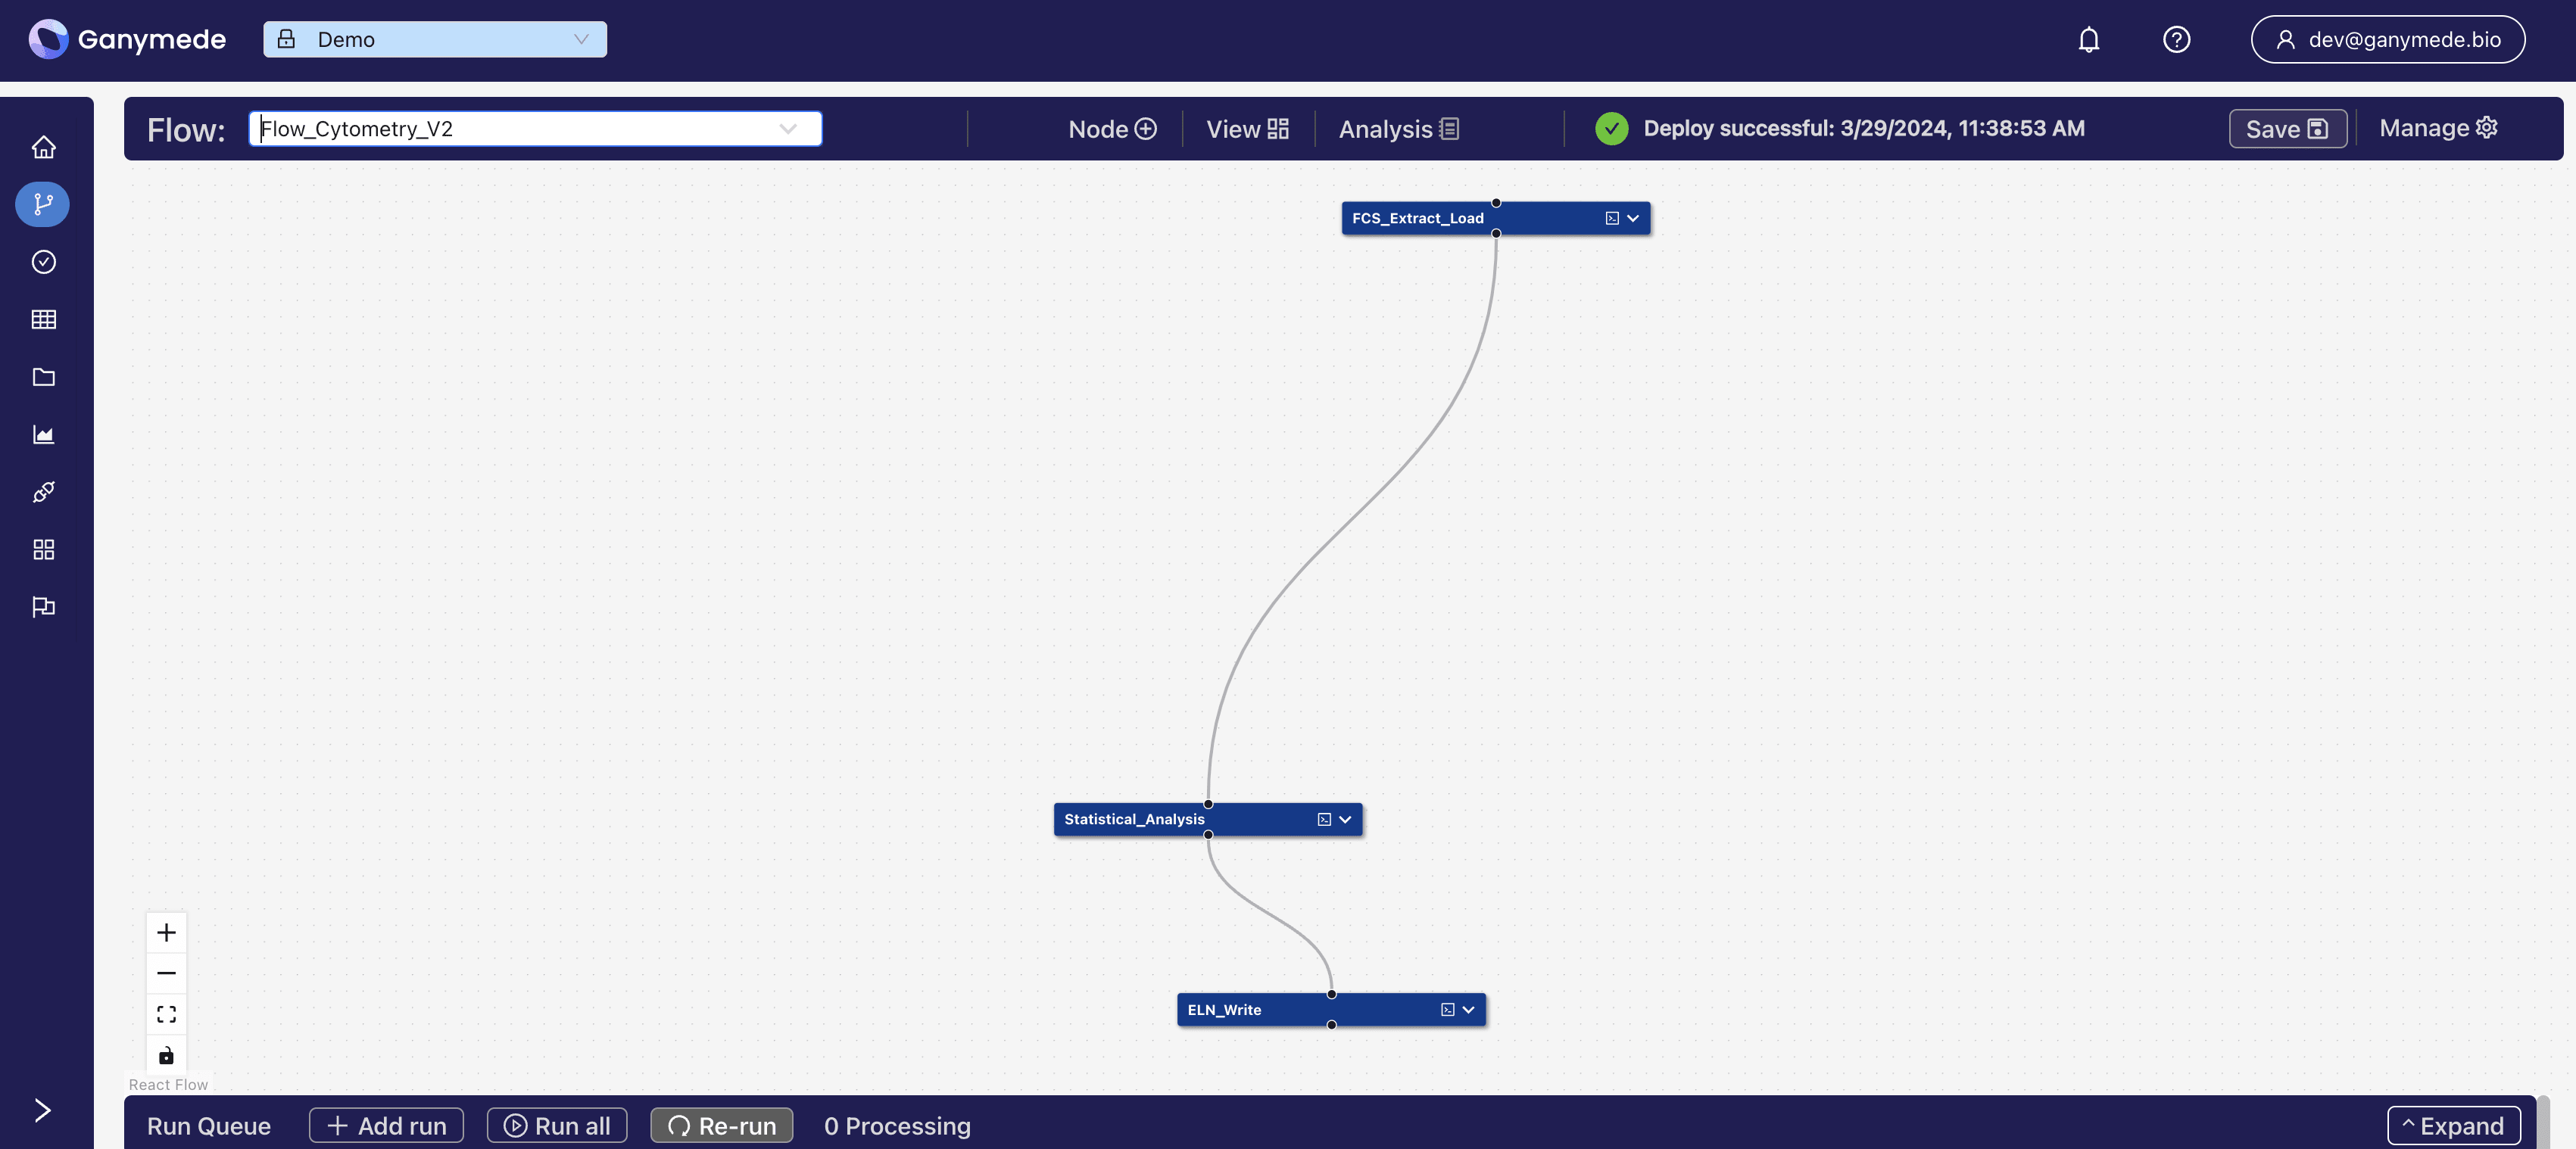
After saving a flow, the entire environment (which contains all flows) is saved and deployed. When this save and deploy is taking place, users are temporarily restricted from running flows. A tooltip will be displayed to the user if they try to run a flow during this time. Users can observe the status of environment updates on the page.
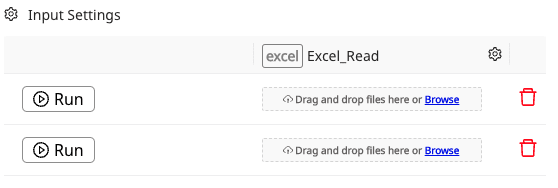
Running Flows
To select input files for flows, users can click
to choose a file or drag-and-drop a file into the box labeled "Upload file here". If is clicked, users have the option to either select an input file to process from the local computer or from Ganymede Cloud Storage (for files previously executed on flows in Ganymede).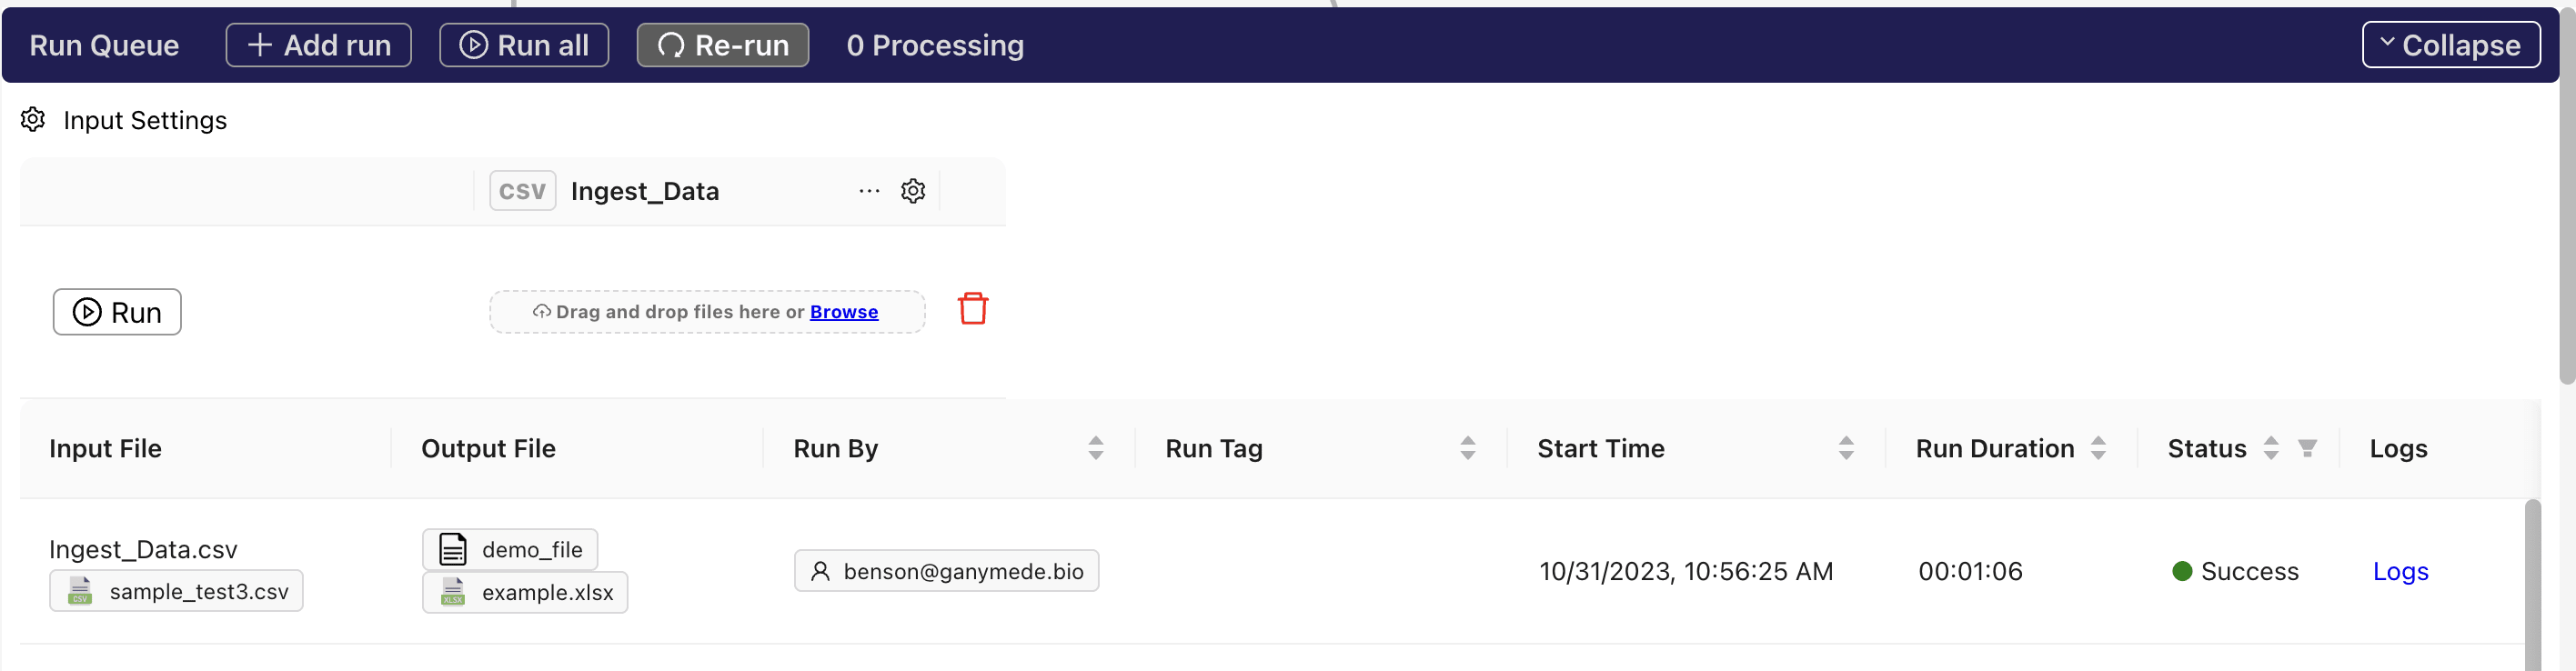
If the input file is uploaded from local computer and has previously been uploaded to the corresponding flow and node (as determined by file name), users are prompted with an option to use the file that was previously uploaded or to save a new version with a unique id appended to the end of the file name.
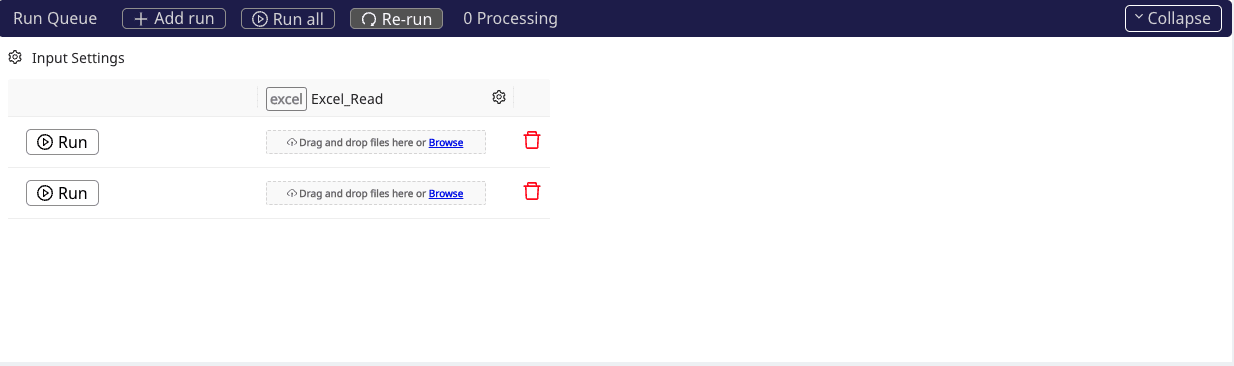
To run the same flow with different sets of input files, add additional rows to the input box by clicking on the
button.Clicking the
button on the Flow Inputs node kicks off the flow run. Run progress can be tracked by clicking on the Runs button in the header, or by navigating to the page.All inputs MUST be filled out otherwise the run will not be started. A message box will appear saying which inputs have not been filled.
Configuring Autorun
Autorun can be configured by clicking on the Input Settings button, which can be found on the top left corner of the Run Queue form:
Clicking here will bring up this modal:
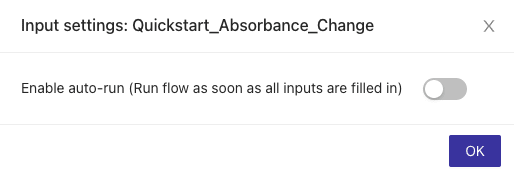
Enabling this feature will allow for runs to start whenever all inputs for a row in the run queue are filled. This button is disabled if any nodes take more than 1 file, or if there are no input parameters for the Flow. This feature melds nicely with file watcher, and will work even after navigating away from the
page.Modifying and Deleting Flows
Edges can be removed by selecting them and pressing "delete" or "backspace" on the keyboard. A selected edge is slightly darker and wider than unselected edges.
To make two nodes dependent on each other within a run, click and drag between two orbs two different nodes. Flow dependencies run top-to-bottom (if vertical layout is specified) or left-to-right (if horizontal layout is specified).
In order to delete flows, click the
Button on the Flow Editor page, which opens up the right sidebar offering a button toDeleting flows is not reversible from within the Ganymede UI, so undoing a flow deletion will require restoring code from a prior commit in the git repo corresponding to the Ganymede cloud tenant.
Flow Save Status Indicator
The status of the latest flow save is displayed by an indicator message in the header bar of the Flow Editor page. Flows can’t be run while a flow save is in progress, which can be tracked by this indicator. If no flow is currently saving the status indicator will display the time of the last successful flow save.

While a flow save is in progress the indicator message will display in sequence "Save in progress", "Build in progress", and "Deploy in progress" depending on which part of the save pipeline that is running.


If an error is encountered during a flow save then an error message will be displayed.

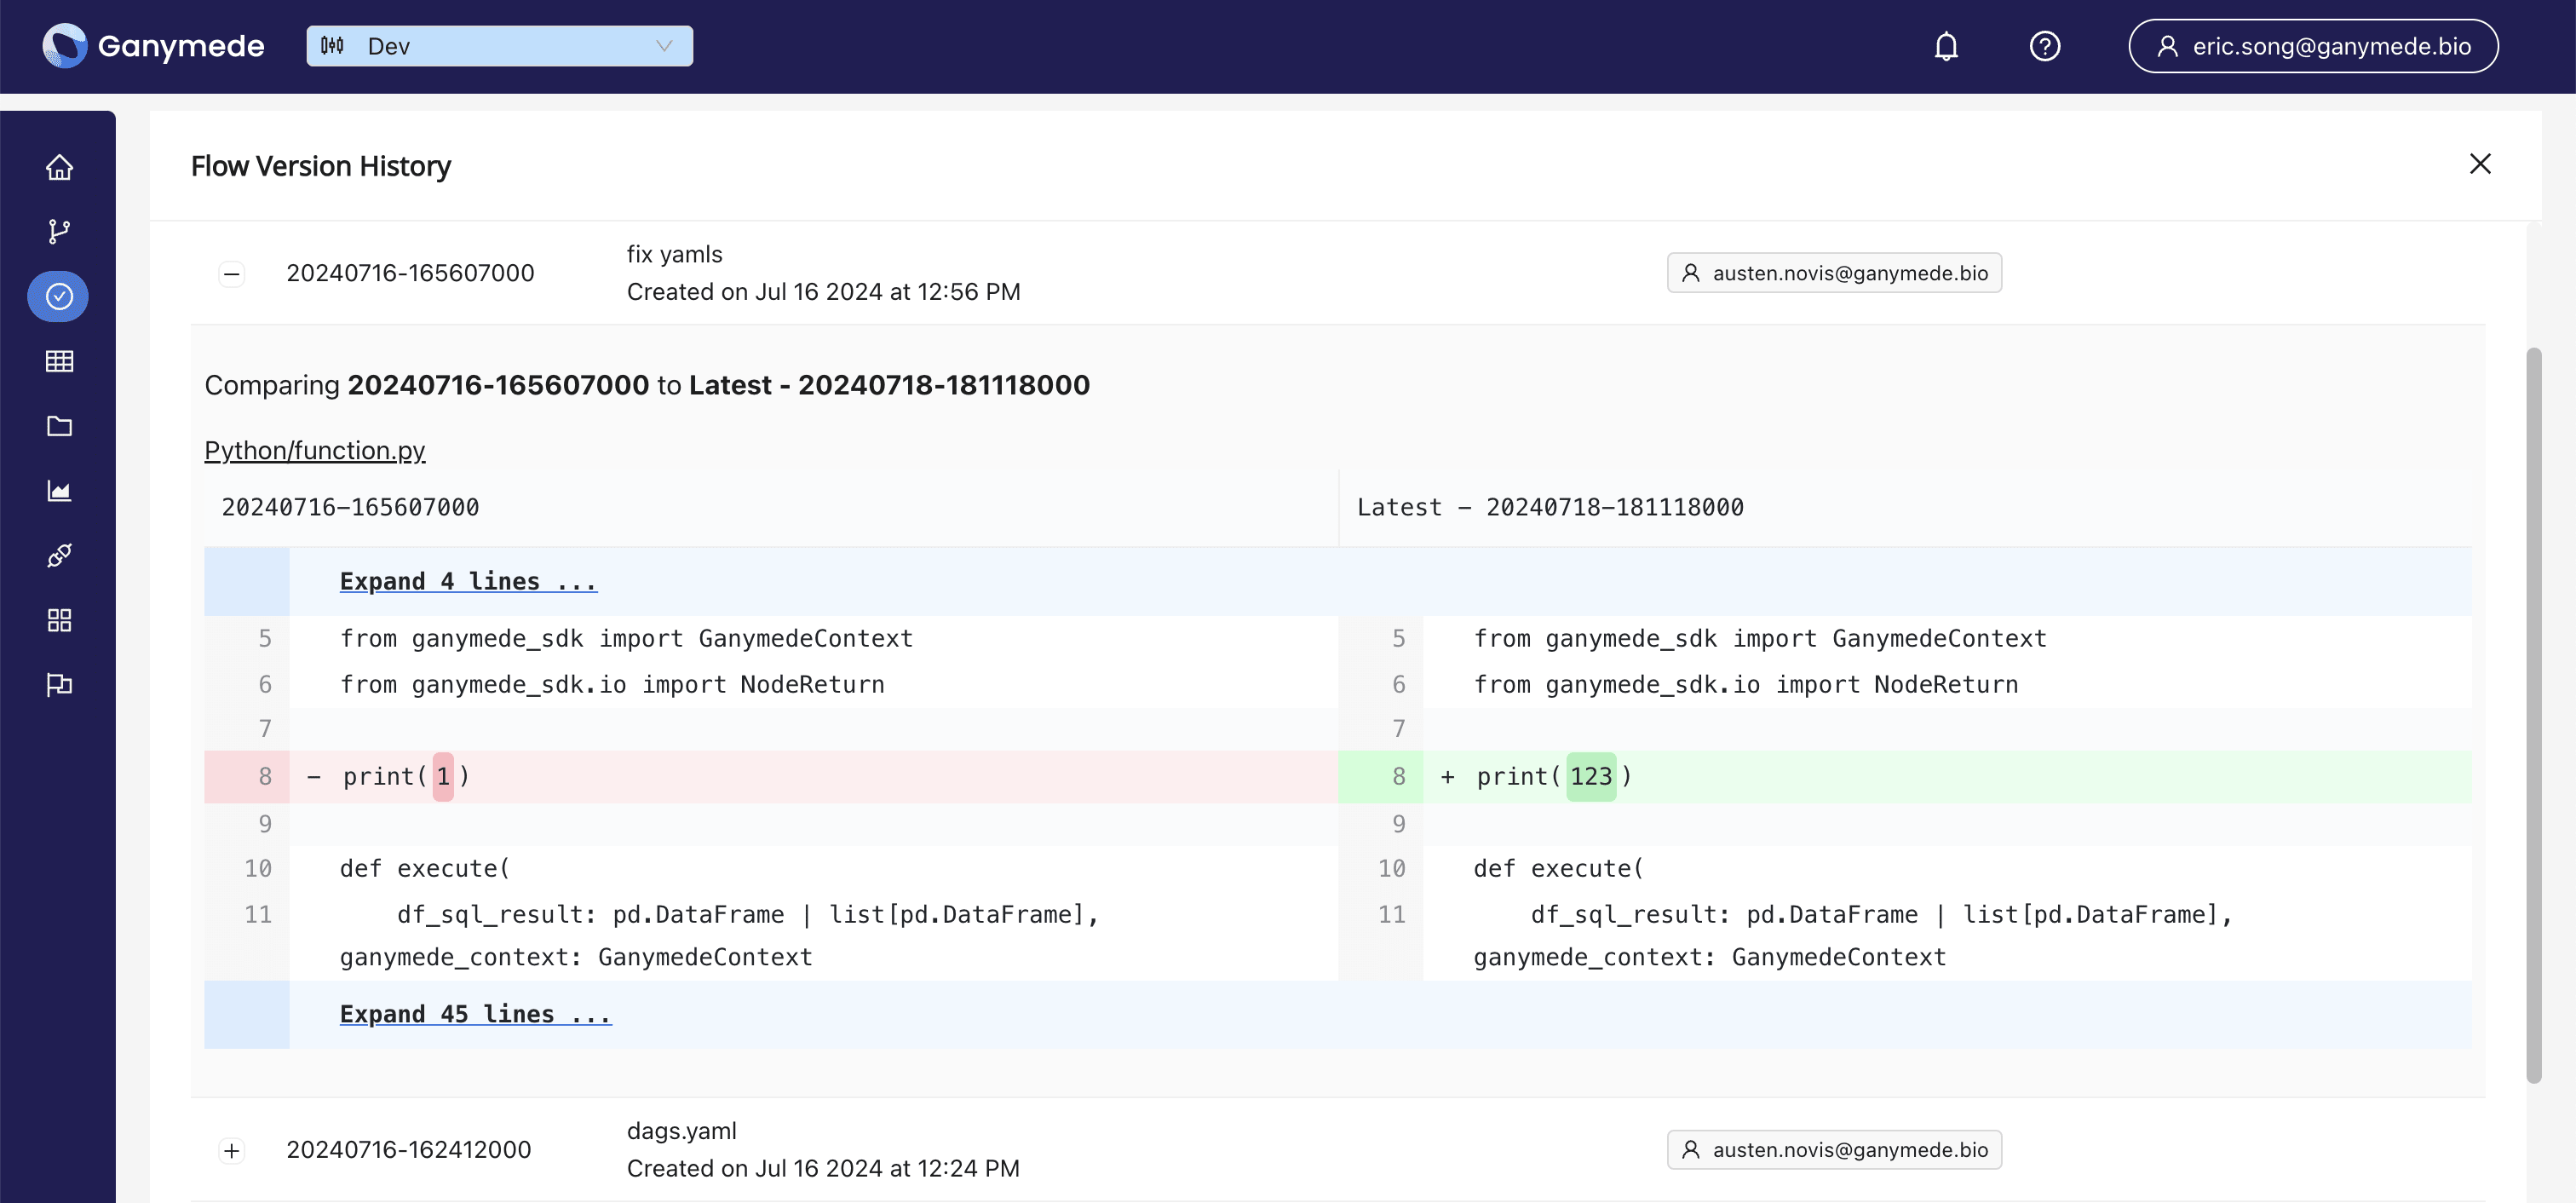
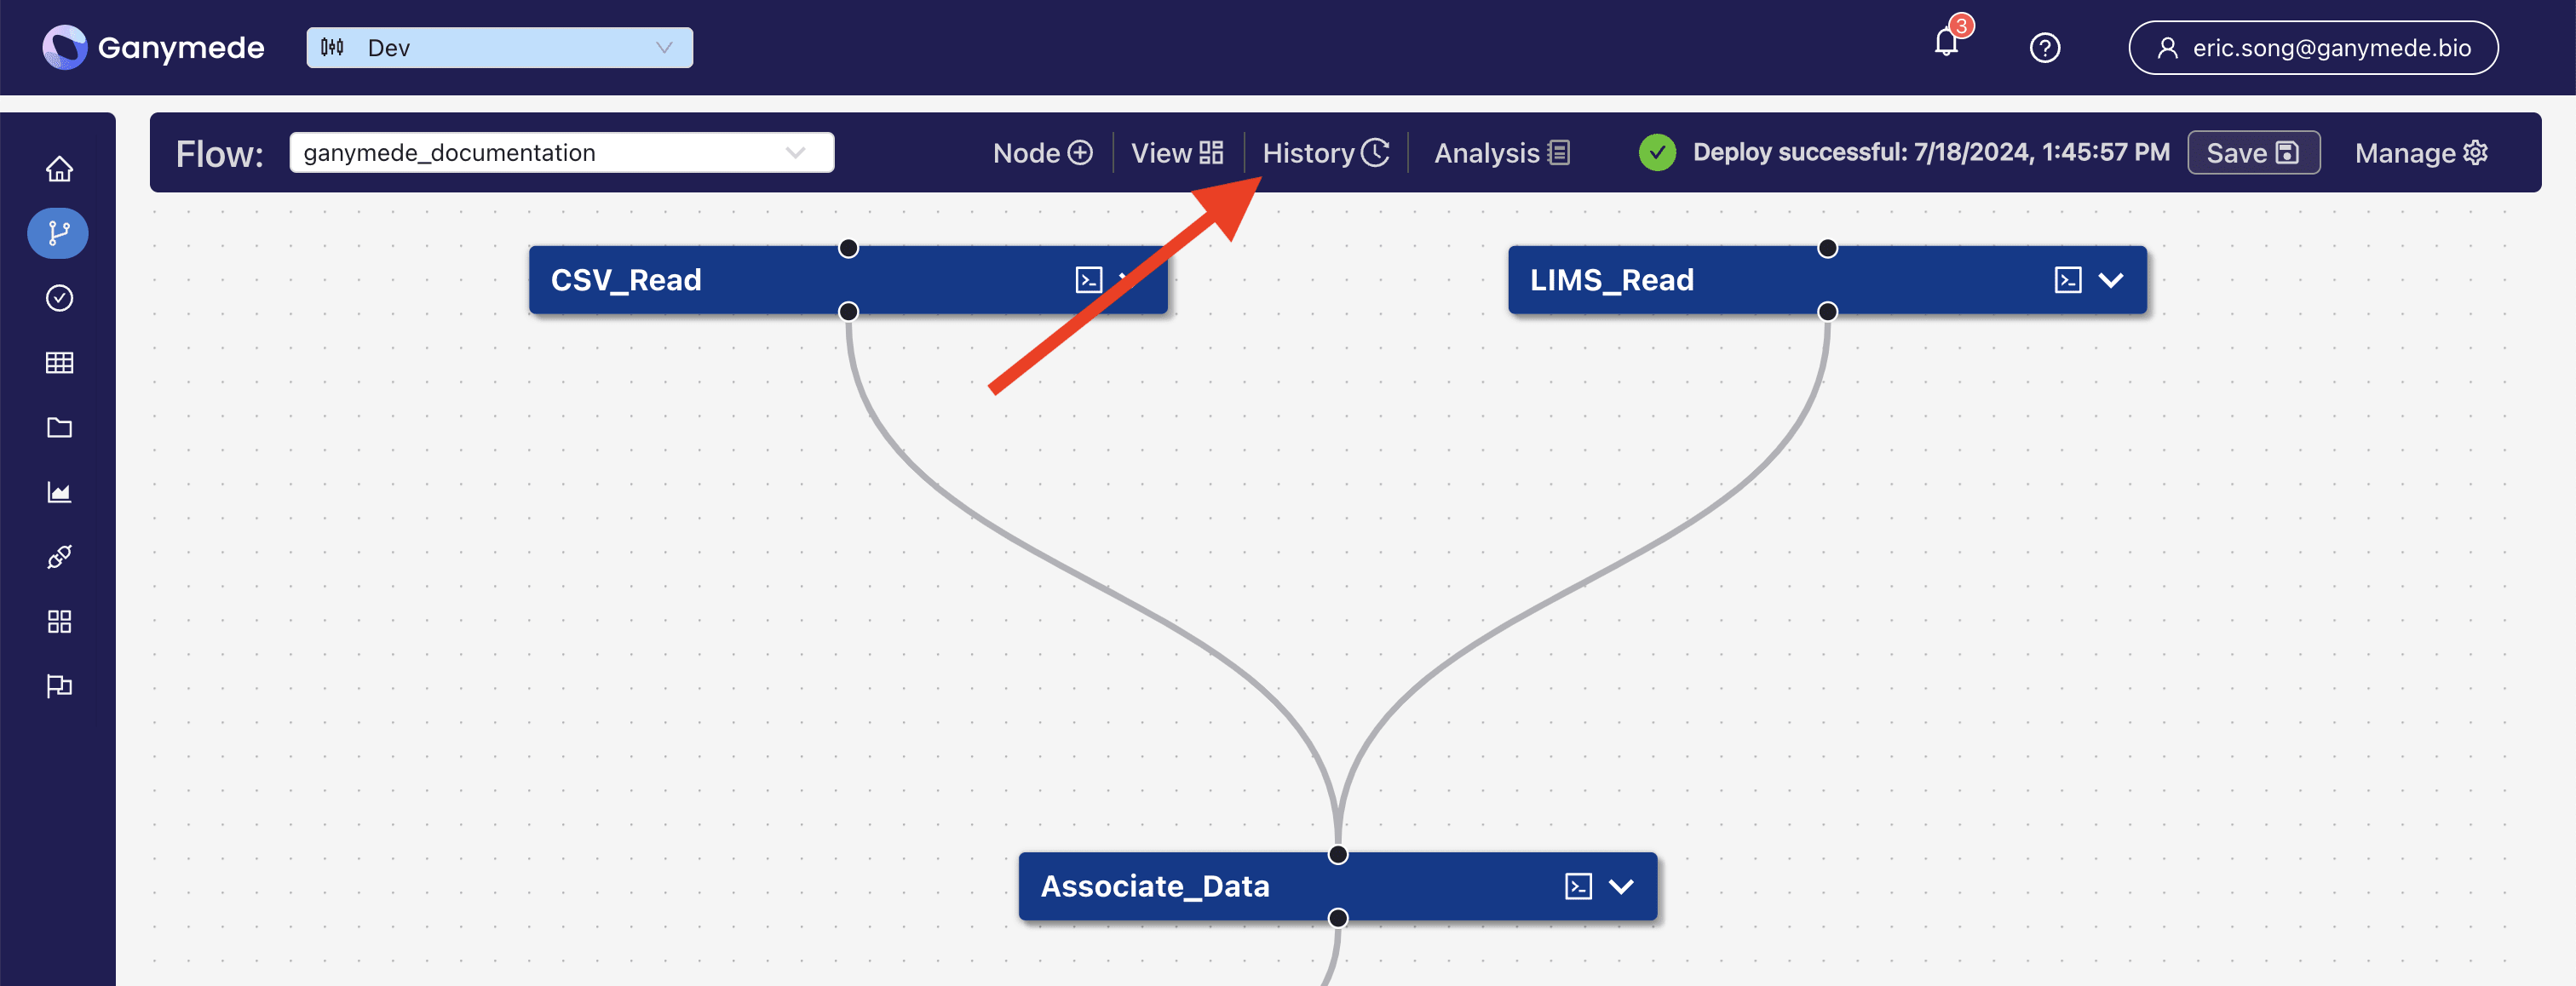
Flow Versions
All changes to a Flow will be tracked as a new Flow Version. A history of all Flow Versions can be viewed by clicking on the History button in the Flow Editor page.
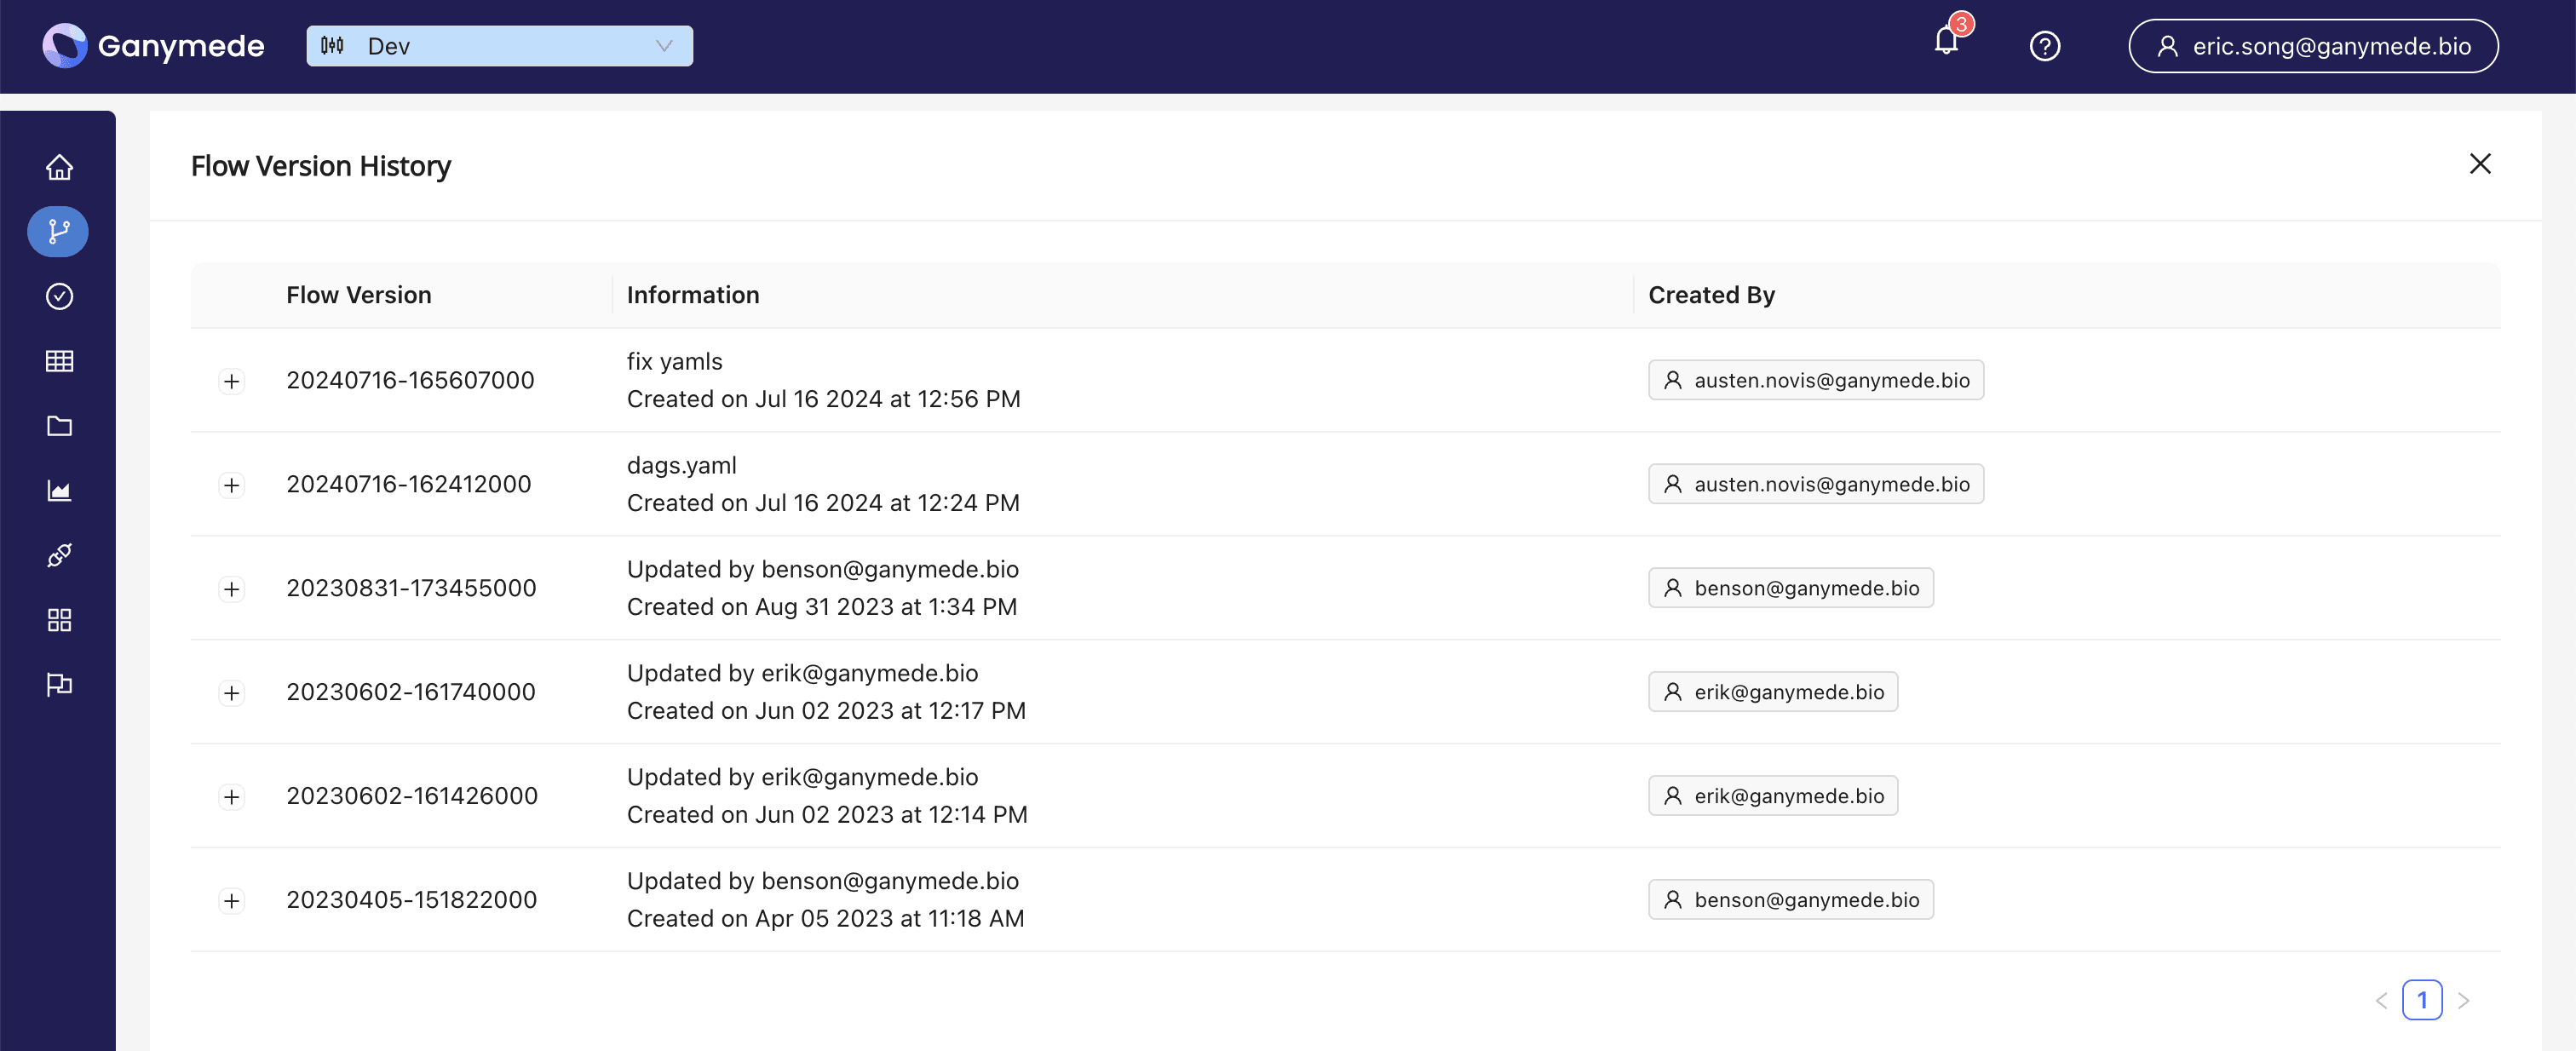
Some Flow Versions created before July 18th 2024 may not be linked to a "Created By" user.
Expanding a row will show the changes between the selected version and the current version of the Flow, not just the changes introduced in the selected version.
The changes are shown like a side by side git diff where the left is old and the right is current.