Agent Overview & Configuration
Overview
Agents are Windows/Linux background services that can filter and process data, upload files into Ganymede Cloud, initiate data processing pipelines, and deliver data from Ganymede Cloud to instrument PCs.
Starting with version 5.6.0, Ganymede introduces the Gateway architecture, which simplifies deployment and management of Agents across your infrastructure.

For system requirements, see Agent Network Config & Prerequisites.
Gateway Architecture
The Gateway model allows you to install a single executable per PC that can host multiple Connections. This simplifies deployment and maintenance compared to installing separate executables for each Connection.
Key Concepts
- Gateway: A single executable that you install on a PC. The Gateway manages one or more Connections and handles communication with Ganymede Cloud.
- Host: A PC where a Gateway is installed and running. Each Host can run multiple Connections.
- Agent Template: The code and configuration that defines how a Connection behaves (trigger, processor, and action logic). Agent Templates are created in the Ganymede UI and can be deployed to any Host.
- Connection: A running instance of an Agent Template on a Host. Connections perform the actual work of watching directories, processing files, and interacting with Ganymede Cloud.
Benefits of the Gateway Model
- Simplified installation: Install the Gateway executable once per PC, then add Connections through the Ganymede UI without additional installations.
- Centralized updates: Core version updates apply to all Connections on a Host simultaneously.
- Flexible deployment: Add, remove, or move Connections between Hosts without reinstalling executables.
- Enhanced monitoring: The Gateway sends detailed telemetry to track files seen versus files uploaded, enabling advanced monitoring of Connection performance.
Traditional vs Gateway Architecture
In the traditional model, each Connection requires its own executable to be downloaded and installed on the instrument PC. With the Gateway model, you install the Gateway executable once, and then create Connections on that Host through the Ganymede UI.
| Aspect | Traditional Model | Gateway Model |
|---|---|---|
| Installation | One executable per Connection | One Gateway executable per Host |
| Adding Connections | Download and install new executable | Create Connection in UI |
| Core updates | Update each Connection separately | Update Host once |
| Moving Connections | Uninstall and reinstall | Move through UI |
Migrating from Agents to Gateway
If you have existing Connections running on the traditional Agent model, you can migrate them to the Gateway architecture.
Migration Steps
- Update the Host to version 5.6.0 or higher, renaming the Host as appropriate
- Update an additional Host to version 5.6.0 or higher (if you want to move Connections between PCs)
- Navigate to the page of the Host where you'd like the Connection to move to
- Select 'Create connection on host', then 'Move existing connection'
- Wait until the migration is complete
- Uninstall the old Host from the PC at your next convenience—it will continue to run without any Connection
After migration, the original executable can be uninstalled using the standard uninstallation process described in Uninstalling Agent Connections.
Terminology
Deployment architecture
- Gateway: A single executable installed on a PC that manages one or more Connections and handles communication with Ganymede Cloud. Available in version 5.6.0+.
- Host: A PC where a Gateway is installed and running. Hosts are identified by name in the Ganymede UI.
- Agent Template: The code and configuration that defines Connection behavior. Agent Templates are created in the Ganymede UI and deployed to Hosts as Connections.
- Connection: A running instance of an Agent Template on a Host, actively watching for triggers and processing data.
Agent structure
- Agent Template (or Agent): A combination of a trigger, processor, and action configuration to move data from a remote user device into Ganymede.
- Trigger: A component configured to initiate the Agent pipeline based on a specific change or event.
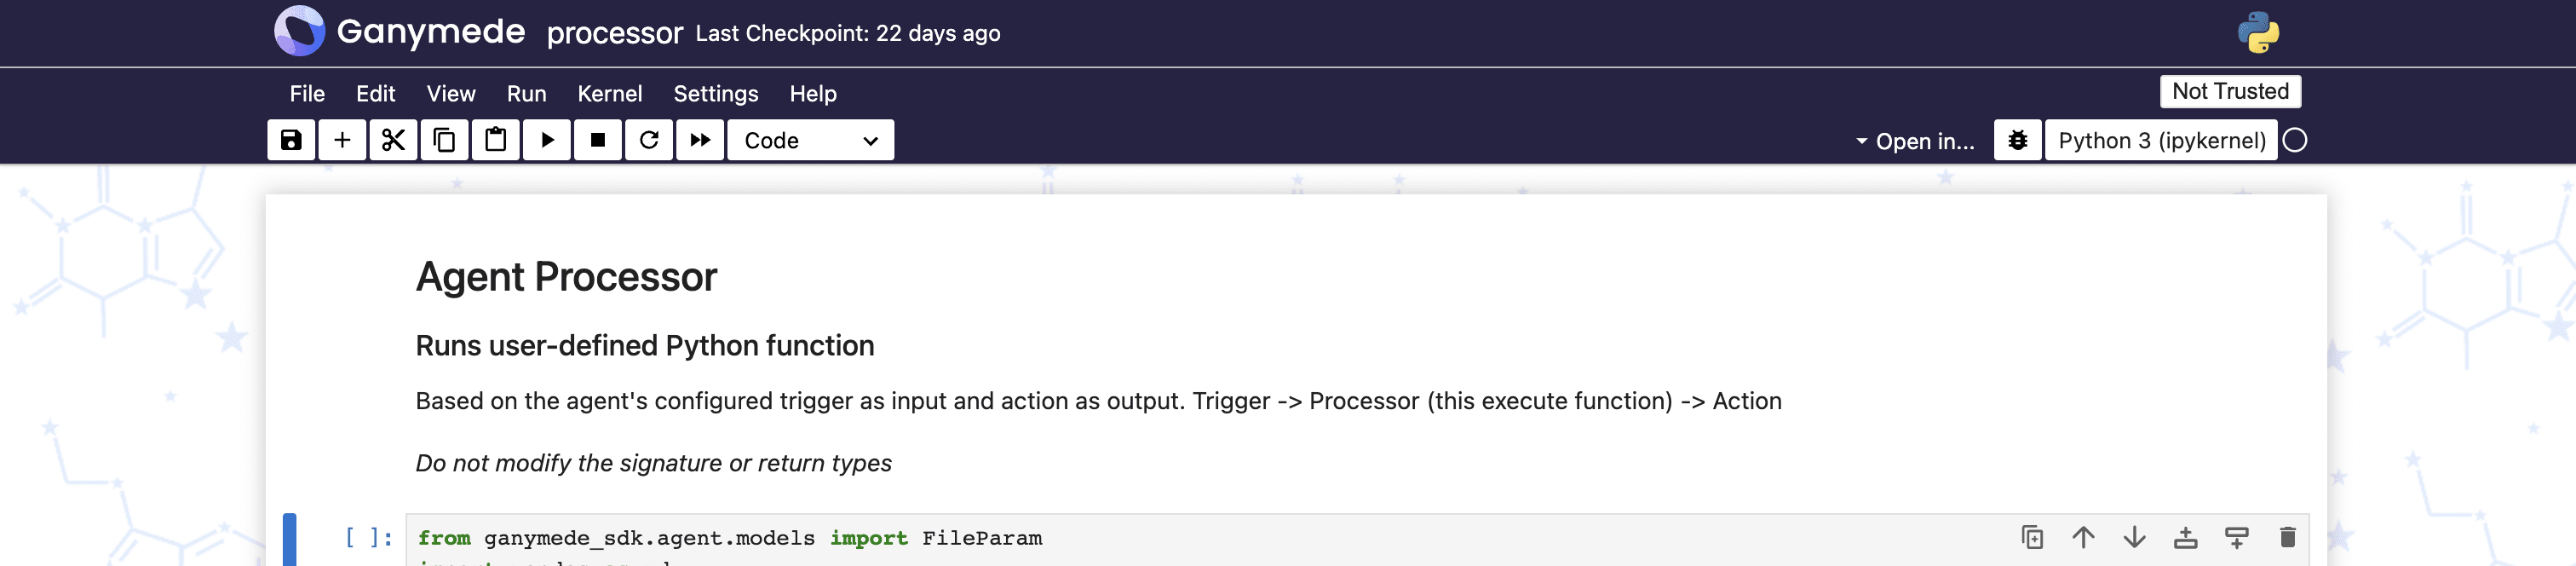
- Processor: User-defined code that converts data produced by a trigger into a format suitable for the action.
- Action: Interaction with Ganymede's cloud or application that moves the processed data to the desired location.
- Connection: A running instance of the Agent Template that is or has been connected to Ganymede, waiting for the configured trigger.
- Pipeline: A data flow of trigger -> processor -> action, tailored to the use case. Pipelines may share the same trigger and action but differ in the processor template based on the use case.
Agent / Connection configuration
- Runtime Update: An in-place update to the latest processor and configuration (Agent and Connection levels) without stopping the process. The pipeline loop temporarily pauses to reload files, but no data is lost.
- Full Update: A complete update of the Connection binary, useful for incorporating new dependency updates or core-codebase changes. A new Connection executable must be brought up in parallel.
- Connection Configuration: Each installed executable maintains its own name, labels, variables, and file tags. This configuration, along with the “parent-level” Agent configuration and processor, makes a Connection unique. Some metadata, like ID, start time, version, and generated metadata, is not configurable.
- Connection Version: Updated whenever the Connection configuration is modified. It follows the standard Ganymede version scheme of YYYYMMDD_HHmmSSssss.
- Agent Configuration: An Agent's action and trigger can be configured for certain behaviors. The configuration includes user-friendly options like name and file tags.
- Agent Version: Updated whenever the Agent configuration changes, following the standard Ganymede version scheme.
- Core Version: Refers to the underlying core Agent repo version, which is the foundational code all Agents run on. New features and bug patches increment this version.
- Connection Variables: Key-value pairs stored in the Connection configuration, accessible by the user, and used by processor code that depends on certain Connection-level variables.
- Connection Labels: Strings used to categorize and identify Connections in the Ganymede UI.
- Connection Context: An internal dictionary within the code that is not exposed to the user but allows data to pass between the Agent trigger, processor, and action if necessary.
Building an Agent
To create a new Agent, click the
button on the Agents tab of the Connections page.
The left side of the configuration panel is used to specify the Agent's configuration, while the right side displays the default Python script associated with the Agent, which can be modified after installation.

After filling out the form, click
to start building Windows and Linux executables. When the build is complete, the Agent can be downloaded from the Ganymede application by selecting the corresponding Agent from the Connections tab.Building an executable typically takes around 10 minutes. Once built, the Agent can be downloaded onto the instrument PC from the Connections tab of the Ganymede web app and installed.
Configuring Agents
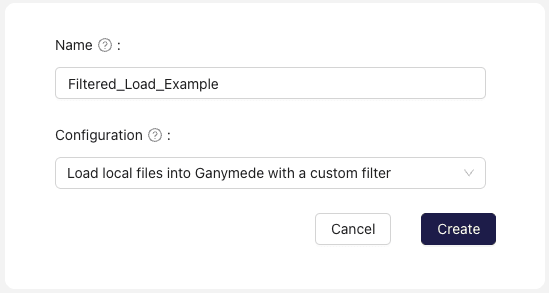
All Agents have two required input parameters, Name and Configuration. Once the Configuration is selected, specific input parameters may appear.
The Name input is used to specify the display name for the Agent.
The Configuration input specifies the action performed by the Agent, with options including:
-
Watch for files locally then run flow: Monitor specified directory on the local file system for files to process and execute upon observing new files matching specified pattern
-
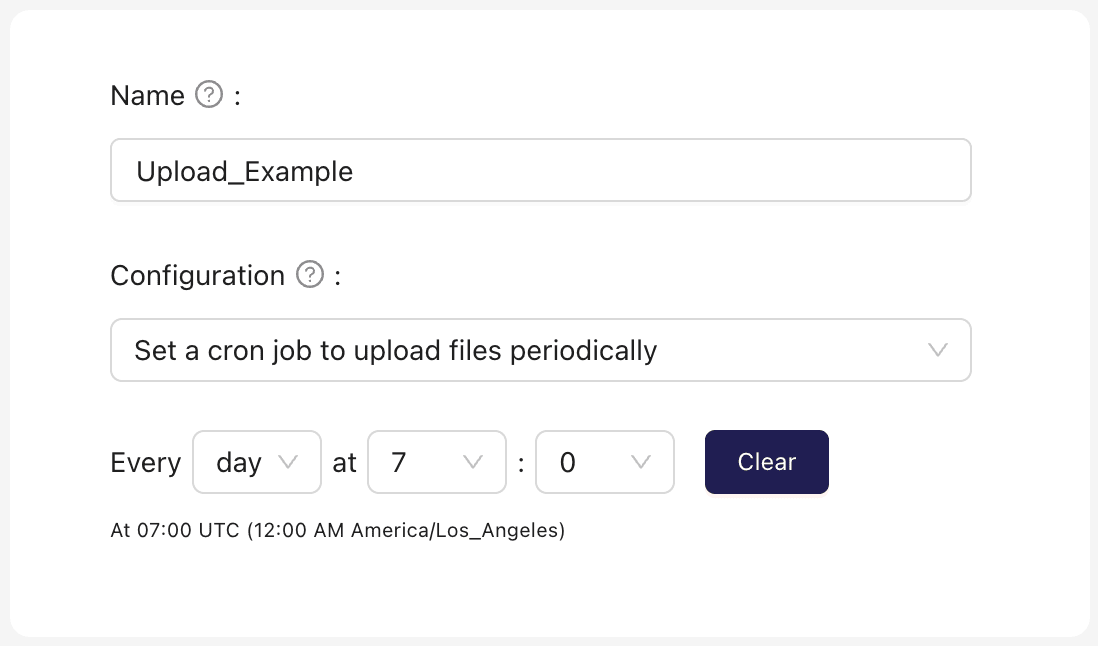
Set a cron job to run flows periodically: Periodically observe local directory for files and deliver those files to Ganymede Cloud for processing
-
Watch for files locally and upload: Monitor specified directory on the local file system and upload files to Ganymede Cloud upon observation.
-
Watch for flow outputs then save locally: Monitor specified flow in Ganymede Cloud Storage for new output files, and capture + process files on local instrument PC upon observation.
noteFor Cloud Watcher agents that download files from Ganymede Cloud, you can specify that they watch for flow inputs (instead of the flow outputs) by adding the following to the Additional Params input box:
-v "input_bucket=true" -
Load local files into Ganymede with a custom filter: Send specified files on local instrument PC and process on Ganymede Cloud
-
Set a cron job to upload files periodically: Periodically deliver files to Ganymede Cloud
The execute function in user-defined code for every Agent type can return None to skip execution. This can be useful for conditional execution based on the state of the system or the data being processed.
Configuration Options
Reserved variables for all Agents
Reserved variables are used to configure Connection behavior; these can be set at installation or in the Connections panel post-installation. The following reserved variables are available for all Agent types:
get_process_metrics: for Agents v5.5.5+, specifies whether to collect host metrics (CPU, memory, disk) during file processing. Set to "false" to skip this collection if not needed; the default value is "true".restart_cron_utc: for Windows Agents v5.5.21+, specifies the UTC time at which the Windows service associated with the Agent will be restarted. For example, setting this to "0 * * * *" will restart the service every hour on the hour. This can be helpful for limiting memory usage for frequently executed Agents. Note: restarts will drop the state of captured files, and so generally usage aligns best with cron and file watcher agents with the "ignore_duplicates" toggle set.
Reserved variables for Agents that run flows
Agents will retry flows using exponential backoff if they fail. The following reserved variables are available for Agents that run flows for Agents v5.1.44+:
max_flow_retries: Number of times the Agent will retry running a flow if it fails. If not specified, the default value is 6.flow_retry_multiplier: The multiplier for the time that the Agent will wait between flow retries. If not specified, the default value is 2; this means that each subsequent retry will wait twice as long as the previous one.flow_retry_min_time: The minimum time (in seconds) that the Agent will wait before retrying a flow. If not specified, the default value is 2 seconds.flow_retry_max_time: The maximum time (in seconds) that the Agent will wait before retrying a flow. If not specified, the default value is 60 seconds.flow_retry_request_timeout: Number of seconds that the internal request from Agent to Ganymede Cloud to run a flow will wait before timing out. If not specified, the default value is 30 seconds.
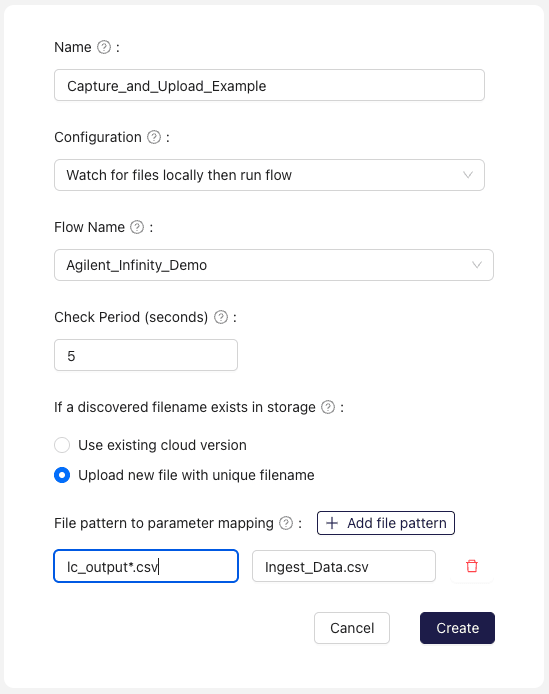
Watch for files locally then run flow
A Connection watches a directory (and associated subdirectories) for new files and updates to existing files. The Flow configured with the Agent is triggered when all expected files are found.
Input Parameters
-
Flow Name: The flow to run upon observing new files matching the specified pattern. -
Check Period (seconds): The frequency with which the Agent will poll the local directory for new files. -
If a discovered filename exists in storage: Specifies whether to use the file in storage or the observed file in the local directory. -
File pattern to parameter mapping: A glob pattern associated with the input parameter(s) for the selected flow.noteThis option is only available during Agent creation. Further configuration updates will occur inside the notebook, not inside the agent configuration
-
File Tags: Tags to associate with the files uploaded to Ganymede Cloud. -
Image: An image to associate with agent in the Ganymede UI. -
Auto deploy code and configuration changes to Live Connections: If checked, updates to Agent code will be reflected on current Connections. -
Sync files on connection start: When enabled, the Connection scans the watched directory at startup and uploads any files that were created or modified while the gateway was offline. See Sync files on connection start for details.
Sync files on connection start
The "Sync files on connection start" toggle (available in the file watcher trigger options) protects against missed files when the Connection is not running — for example after a host reboot, a network outage, or a Connection update. When enabled, each time the Connection starts it performs a one-time reconciliation scan of the watched directory in addition to the live filesystem watcher.
The scan runs in a background daemon thread that starts after the live watcher is up, so newly created files are never delayed by the scan. For each Connection with the toggle enabled, the gateway:
- Fetches the set of MD5 hashes already recorded for the Connection from Ganymede (paginated, 1,000 records per page).
- Walks the watched directory recursively, applying the same filters as the live watcher:
ignore_hidden_files,ignore_hidden_directories,ignore_list, and the file watcher's configured glob patterns. - Skips any file whose modification time is newer than
stable_timeseconds in the past — those will be picked up by the live watcher once they stabilize. - For each remaining candidate, computes the local file's MD5 and skips it if the hash is already in the known set. Files with an unrecognized MD5 are enqueued through the same
add_file()path used by the live watcher, so the configuredduplicate_handlingpolicy applies as a second safety net. - Throttles uploads to roughly two per second to avoid overwhelming the API server.
Files modified while the gateway is running are always handled by the live watcher; the startup scan only covers files that changed while the Connection was offline.
This feature is independent of deduplicate_by_md5 (which deduplicates uploads against Ganymede Storage during normal operation) — the startup scan always uses MD5 to decide what is "new", regardless of that setting.
Reserved variables for File Watcher Agents
Reserved variables are used to configure Connection behavior. These can be set at installation or in the Connections panel post-installation.
input_path: specifies the directory to watch.check_interval: for Agents v5.1.28+, specifies frequency (in seconds) with which a Connection will poll the local directory for new, stable files. If left blank, the default value is 5 seconds.stable_time: for Agents v5.1.28+, specifies the time (in seconds) that a file must remain unchanged before being considered stable. If left blank, the default value is 5 seconds.ignore_hidden_files: for Agents v5.4.61+, specifies that hidden files should be ignored if set to "true". If left blank, the default value is "false".ignore_hidden_directories: for Agents v5.4.68+, specifies that files in hidden directories should be ignored if set to "true". If left blank, the default value is "false".ignore_list: A comma-separated list of patterns that tell the Agent which files/directories to skip watching entirely (events will not hit the agent logs or processor code). Useful for ignoring large volumes of events from backup, log, or other oft-modified but irrelevant files.- NOTE: These patterns use a simplified "glob" syntax where the double asterisk
**can only appear at the start of a pattern. For example,**/*.txtis valid (matches text files in any directory), butbackup/**/*.txtis not valid (**is not at the left). To match files in subdirectories, use single asterisks*. You'll need multiple patterns, one for each directory level - e.g.**/backup/*.txtAND**/backup/*/*.txtfor files one level deeper, and so on for each additional subdirectory level (since right**doesn't work). Full pattern syntax details are in the Pythonpathlibdocumentation.
- NOTE: These patterns use a simplified "glob" syntax where the double asterisk
stream_contents: for Agents v5.4.66+, specifies whether to deliver the file contents at the time of upload (by execute function), rather than file contents captured by get_param_mapping. This can be useful for improving memory efficiency of Agents watching for groups of files if set to True. By default, this is set to false.max_concurrent_workers: for Agents v5.4.79+, specifies the maximum number of concurrent workers used to process files. By default, this is set to 10. The true number of maximum concurrent workers is the minimum of this value, 4 * number of CPU cores, and 64.allow_overlapping_runs: for Agents v5.4.79+, specifies whether file processing (file upload / Flow run) can overlap with the next file processing. By default, this is set to true; if set to false, the Agent will wait for the current file processing to complete before starting the next file processing.
User-Defined Code
The user-defined code will be generated to map those file patterns to parameters. Three functions may require modification during configuration:
get_param_mapping: This function is called whenever a file is added or modified in the watch directory. Modify this function to specify the files you want to look for prior to triggering a flow.execute: Called when all glob patterns specified byget_param_mappinghave been matched, this object returned by this function specifies the inputs to the flow that is executed when all files are observed.fp: This function returns a function that performs pattern matching against a file path. Use this function as a template for matching files.
For example, if the instrument outputs a CSV file called "{id}_lc_output<YYYYMMDD>.csv" that is to be ingested by a CSV_Read node called "Ingest_Data", an appropriate configuration would be "{id}_lc_output*.csv" for the input box associated with the "Ingest_Data.csv" node. The corresponding user-defined code would be:
from ganymede_sdk.agent.models import TriggerFlowParams, FileWatcherResult
import re
from typing import Dict, Callable
import glob
import os


def fp(watch_dir: str, parent_dir: str, pattern: str) -> Callable[[str], bool]:
    """
    This function returns a function that performs pattern matching against a file path.
    Use this function as a template for creating your own pattern matching functions, which
    you can then use in the values of the return object in the get_param_mapping function.

    Returns
    -------
    Callable[[str], bool]
        Function that takes a file as input and returns True if the file matches the pattern.
    """

    def fp_res(x: str):
        return x in glob.glob(os.path.join(watch_dir, pattern), recursive=True)

    return fp_res


def get_param_mapping(
    watch_dir: str,
    parent_dir: str = "",
    file_name: str = "",
    modified_time: str = "",
    body: bytes = bytes(),
) -> Dict[str, Callable[[str], bool]]:
    """
    This function is called when a file is added or modified in the watch directory.
    Modify this function to capture the files you want to trigger the flow;
    the function should return a dictionary where the keys are <node name>.<param name>
    and values are functions for performing pattern matching against the target file.

    For nodes that accept multiple inputs, specify a list of functions to match against;
    each specified function should uniquely match 1 file.
    """
    id_group = re.search(r"^(\w+)", file_name)
    if id_group == None:
        return {}
    id = id_group.group()
    return {
        "Ingest_Data.csv": fp(watch_dir, parent_dir, f"{id}_lc_output*.csv"),
    }


def execute(flow_params_fw: FileWatcherResult) -> TriggerFlowParams | None:
    """
    Called when all glob patterns specified by get_param_mapping have been matched.

    Parameters
    ----------
    flow_params_fw : FileWatcherResult
        Dict of FileParam objects indexed by <node name>.<param name>

    Returns
    -------
    TriggerFlowParams | None
        Object specifying the inputs to the flow that is executed when all files are observed.  If None is returned, no Flow is triggered.
    """
    return TriggerFlowParams(
        single_file_params=flow_params_fw.files,
        multi_file_params=None,
        benchling_tag=None,
        additional_params={},
    )
If a second parameter, such as an Excel_Read node called "Experiment_Context", is added, the get_param_mapping function would be modified to include that parameter:
def get_param_mapping(
    watch_dir: str,
    parent_dir: str = "",
    file_name: str = "",
    modified_time: str = "",
    body: bytes = bytes(),
) -> Dict[str, Callable[[str], bool]]:
    """
    This function is called when a file is added or modified in the watch directory.
    Modify this function to capture the files you want to trigger the flow;
    the function should return a dictionary where the keys are <node name>.<param name>
    and values are functions for performing pattern matching against the target file.

    For nodes that accept multiple inputs, specify a list of functions to match against;
    each specified function should uniquely match 1 file.
    """
    id_group = re.search(r"^(\w+)", file_name)
    if id_group == None:
        return {}
    id = id_group.group()
    return {
        # The keys in the dict below take the form "<node name>.<parameter name>"
        # For example, the default Input_File node is called "Input_File"
        # and has a parameter called "file_pattern", so the key would be
        # "Input_File.file_pattern"
        "Ingest_Data.csv": fp(watch_dir, parent_dir, f"{id}_lc_output*.csv"),
        "Experiment_Context.excel": fp(watch_dir, parent_dir, f"{id}_context.xlsx"),
    }
This ensures that files matching the parameters are sent to the correct flow node, and files with the same ID are grouped together. For example, if the following files are ingested:
- experiment626_lc_output072623.csv
- experiment627_context.xlsx
- experiment626_context.xlsx
The flow will only start when all files for experiment627 are ready, preventing the flow from starting prematurely.
Files that match a glob pattern will be uploaded to Ganymede storage, even if they are not used in a flow. Files written to the watched directory can be ignored by ensuring they do not match any of the glob patterns for the parameter inputs.
Patterns can also be matched against subdirectories using * for single level subdirectories and ** for any level subdirectories.
For example, if your instrument writes out files in a directory like:
├── experiment_id_1
│   ├── configuration.xml
│   └── results.csv
└── experiment_id_2
    ├── configuration.xml
    └── results.csv
You would use parameters like */configuration.xml and */results.csv to upload the files and submit them to a flow.
Documentation on the objects used in the user-defined code and additional examples can be found on the Agent Templates page.
Example use case
An instrument outputs files to a directory as it completes runs, which are processed in Ganymede Cloud.
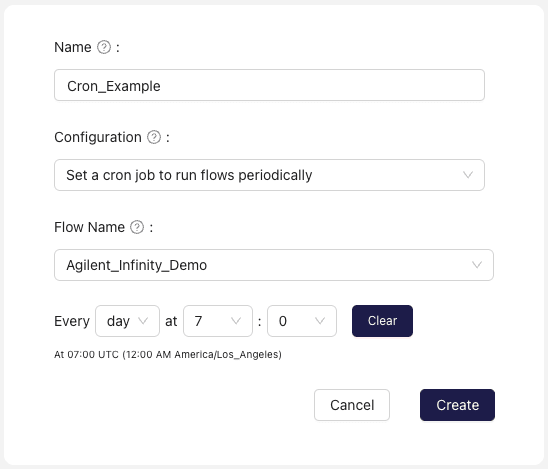
Set a cron job to run flows periodically
A Connection executes a Python script on a set cadence. Commonly, this Agent type is used as a more flexible version of the Agent type that runs flows upon detecting file change, to allow for greater logic customization in triggering Flows.
Cron Agents can conditionally trigger code, depending on the return value of the execute function; no Flow is triggered if None is returned.
from ganymede_sdk.agent.models import FileParam, UploadFileParams


# Required Function
def execute(**kwargs) -> UploadFileParams | None:
    """
    Executes on specified cadence.

    Returns
    -------
    UploadFileParams | None
        Files to upload; if set to None, then no files will be uploaded.
    """

    filename = "changeme.txt"
    body = bytes("Hello, World!", "utf-8")

    new_file_param = FileParam(filename=filename, body=body)

    return UploadFileParams(files=[new_file_param])
Additional examples can be found on the Agent Templates page
Input Parameters
Flow Name: Flow to run upon observing new files matching specified patternTime Interval: Frequency and times with which to run flow, based on UTC timeFile Tags: Tags to associate with the files uploaded to Ganymede CloudImage: An image to associate with Agent in the Ganymede UI.Auto deploy code and configuration changes to Live Connections: If checked, updates to Agent code will be reflected on current Connections.
Reserved variables for cron Agents
Reserved variables are used to configure Connection behavior. These can be set at installation or in the Connections panel post-installation.
max_concurrent_workers: for Agents v5.4.78+, specifies the maximum number of concurrent workers used to process files. By default, this is set to 10. The true number of maximum concurrent workers is the minimum of this value, 4 * number of CPU cores, and 64.allow_overlapping_runs: for Agents v5.4.78+, specifies whether file processing (file upload / Flow run) can overlap with the next file processing. By default, this is set to true; if set to false, the Agent will wait for the current file processing to complete before starting the next file processing.
Example use case
A user-defined script runs once a day to poll and capture updates from telemetry devices, which are then processed in a Ganymede flow.
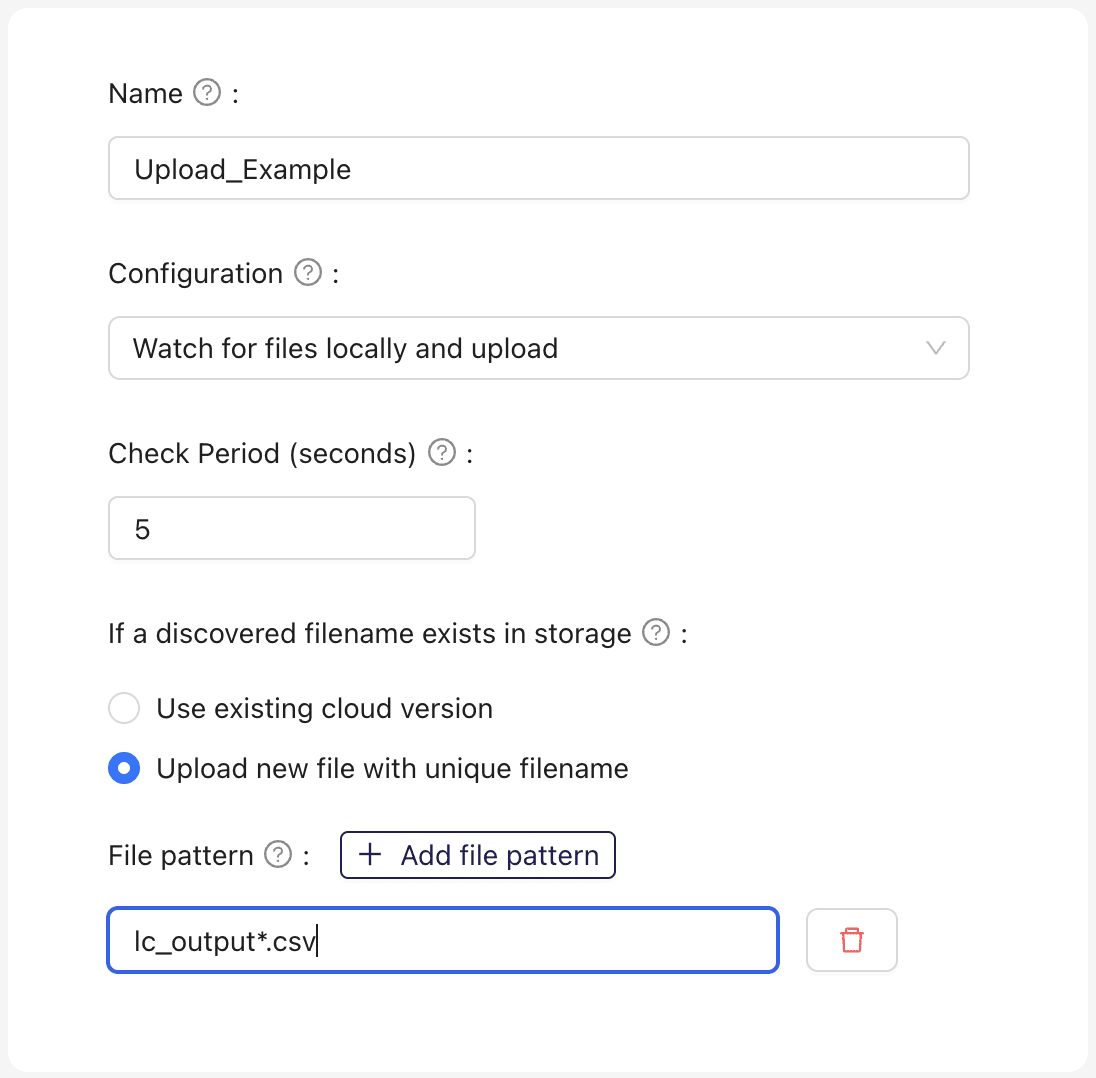
Watch for files locally and upload
A Connection that monitors a local directory (and associated subdirectories) for new files and file updates, uploading them to Ganymede Cloud when observed. This type of Agent does not kick off a Flow.
Input Parameters
Flow Name: Flow to run upon observing new files matching specified patternCheck Period (seconds): Frequency with which Agent will poll local directory for new filesIf a discovered filename exists in storage: Specifies whether to use the file in storage or the observed file in the local directory.File pattern to parameter mapping: A glob pattern associated with the input parameters for the selected flow.File Tags: Tags to associate with the files uploaded to Ganymede Cloud.Image: An image to associate with Agent in the Ganymede UI.Auto deploy code and configuration changes to Live Connections: If checked, updates to Agent code will be reflected on current Connections.Sync files on connection start: When enabled, the Connection scans the watched directory at startup and uploads any files that were created or modified while the gateway was offline. See Sync files on connection start for details.
Example use case
Multiple flow cytometers are used to observe cell populations for a related set of experiments. Ganymede Connections associated with an Agent are configured to systematically capture these runs.
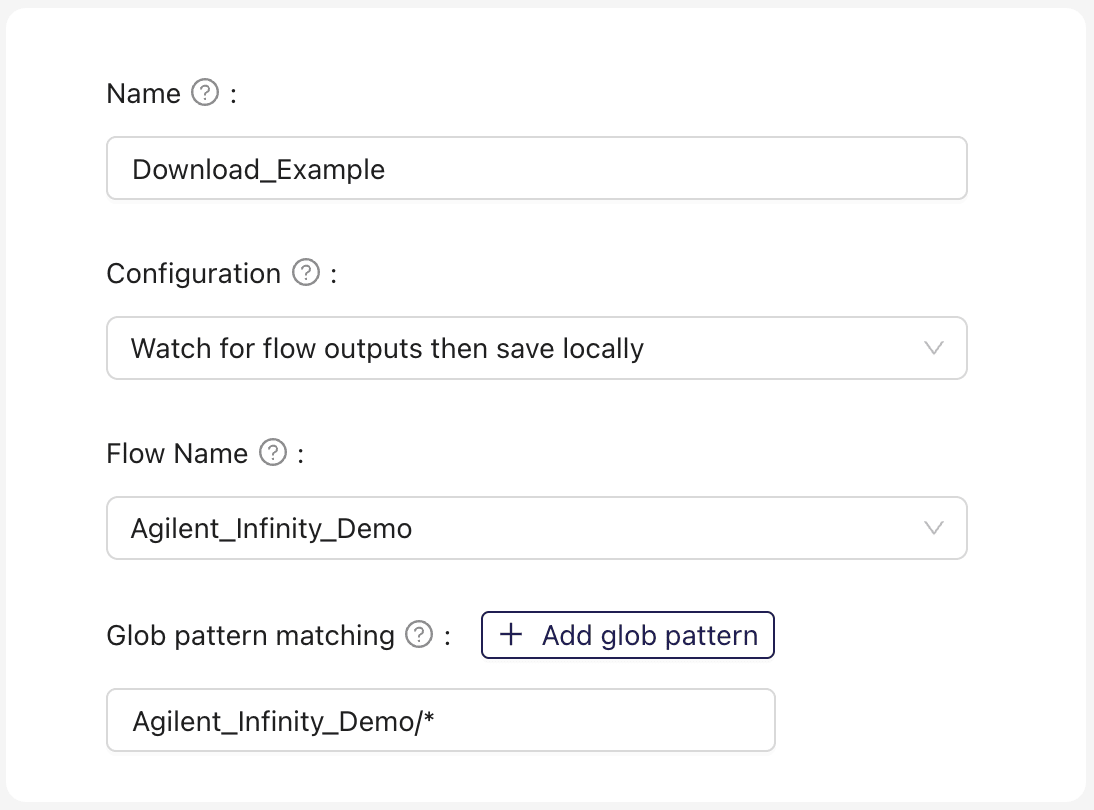
Watch for flow outputs then save locally
A Connection that monitors Flow file outputs, saving them to local directories as specified by the Agent logic.
Input Parameters
Flow Name: The flow from which to download output files. This will autopopulate the glob pattern matching field correspondingly.Glob pattern matching: The glob patterns that output files must match in order to be downloaded.Image: An image to associate with Agent in the Ganymede UI.Auto deploy code and configuration changes to Live Connections: If checked, updates to Agent code will be reflected on current Connections.
Additional examples can be found on the Agent Templates page
Reserved Variables for Download Agents
For this configuration, the following reserved variables are available:
output_path: specifies the directory to store files to.
Example use case
Instructions for lab execution are generated in Ganymede Cloud and downloaded to the instrument PC for execution.
Load local files into Ganymede with a custom filter
A Connection that loads local files into Ganymede one time (as opposed to persistently monitoring a directory for new files and updates). This can be useful for conducting data backfills.
Example use case
A selected subset of key instrument output files are captured on Ganymede Cloud.
Set a cron job to upload files periodically
A Connection that uploads files to Ganymede Cloud on a scheduled cadence.
Input Parameters
Time Interval: The frequency and times at which to upload files, based on UTC time.File Tags: Tags to associate with the files uploaded to Ganymede CloudImage: An image to associate with Agent in the Ganymede UI.Auto deploy code and configuration changes to Live Connections: If checked, updates to Agent code will be reflected on current Connections.
Example use case
A local file is modified at regular intervals and needs to uploaded to Ganymede Cloud after each modification.
Variables and Labels in Windows Agent Connections
For Agents that reference local directories, the monitored directory is specified in the Additional Params input box. All subdirectories of input_path are also monitored.
-v "input_path=/absolute/path"

# Example Windows input path specification
# -v "input_path=C:\Users\<username>\Desktop\watch_folder"

# If the directory is in a network drive, be sure to use the UNC path or IP like so:
-v "input_path=//server/share/path"
# where `server` is the name of the server and `share` is the name of the shared folder

# When using administrative shares, the path should be specified with the $ symbol at the end of the drive letter:
-v "input_path=\\computername\d$\path\to\folder"
More generally, Variables and Labels can be flexibly used to control Connection behavior. Additional Variables and Labels can be defined as show in the example below:
# Example: multiple variables and labels passed in
-v "abc=1" -v "xyz=2" -l "UPLC" -l "Analytical Dev"
Variables and labels can be referenced in your user-defined code by extracting the values from kwargs in the execute function.
# Labels comes back as a list of strings
labels = kwargs.get('labels', [])

# All variables retrieved have a dict[str, str] type
variables = kwargs.get('vars', {})

# Example: Retrieve the `input_path` variable for use in Agent code
input_path = kwargs.get('vars', {})['input_path']

# Example: Retrieve all labels for use in Agent code
connection_labels = kwargs.get('labels', [])
Agents may be unable to run if the computer enters a sleep state; this is particularly relevant for cron flows. To prevent this, ensure that the computer is not set to sleep when the flow is expected to execute.
Windows services use the Local System User, which does not have network privileges by default. You may need to ensure the service runs on a user account that can access the network drive.
To do so, follow the steps below:
- Set Up Authentication:
- Use Windows Credential Manager to store the remote user's credentials on the local system.
- Or, create matching local (if cross-domain) or domain (if on the same domain, e.g. AD) user accounts on both the remote and local systems.
- Check Network:
- Ensure both systems can communicate as described on the Agent Network Config page
- Service Configuration:
- Open
services.mscon the local system. - Find and right-click the Ganymede service >
Properties>Log On. Use the local user account where the credentials are stored (not the "Local System Account").
- Open
- Restart Service:
- In
Services, right-click the service and selectRestart.
- In
Note: Use IP if systems are on different domains.
Configuring User-Defined Python
To modify user-defined code executed by the Agent, select the Agent in the Ganymede app and click on the
button. This opens a notebook where the user can modify the code executed on observed files before transfer.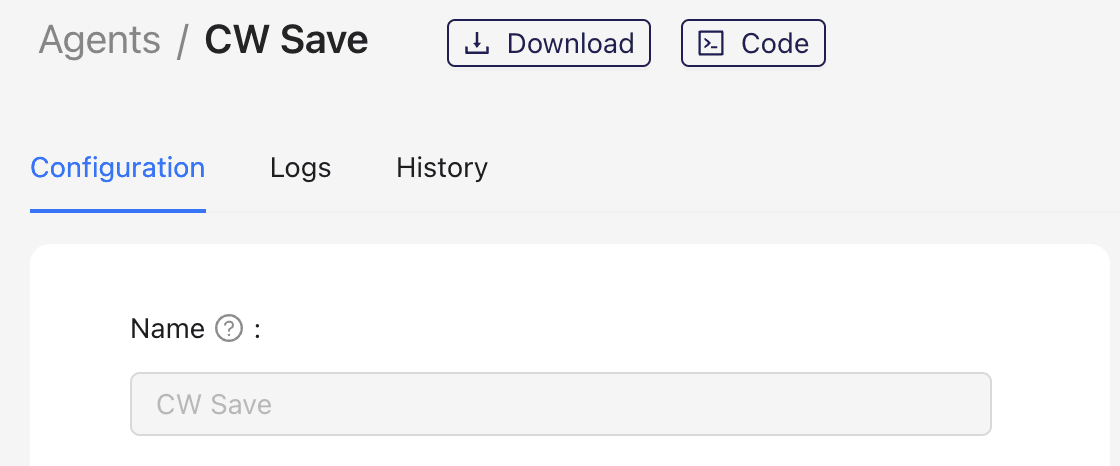
Previously built Agents remain available for download in Ganymede in the History tab.